I first learned what a pinhole camera was during my first year of college after seeing the shoeboxes some art students had turned into cameras using photo transfer paper and aluminum foil. By poking a tiny hole an otherwise lightproof box, they were able to let a small amount of light reflect off of a subject and onto paper with a light-sensitive coating that was developed to show an image.
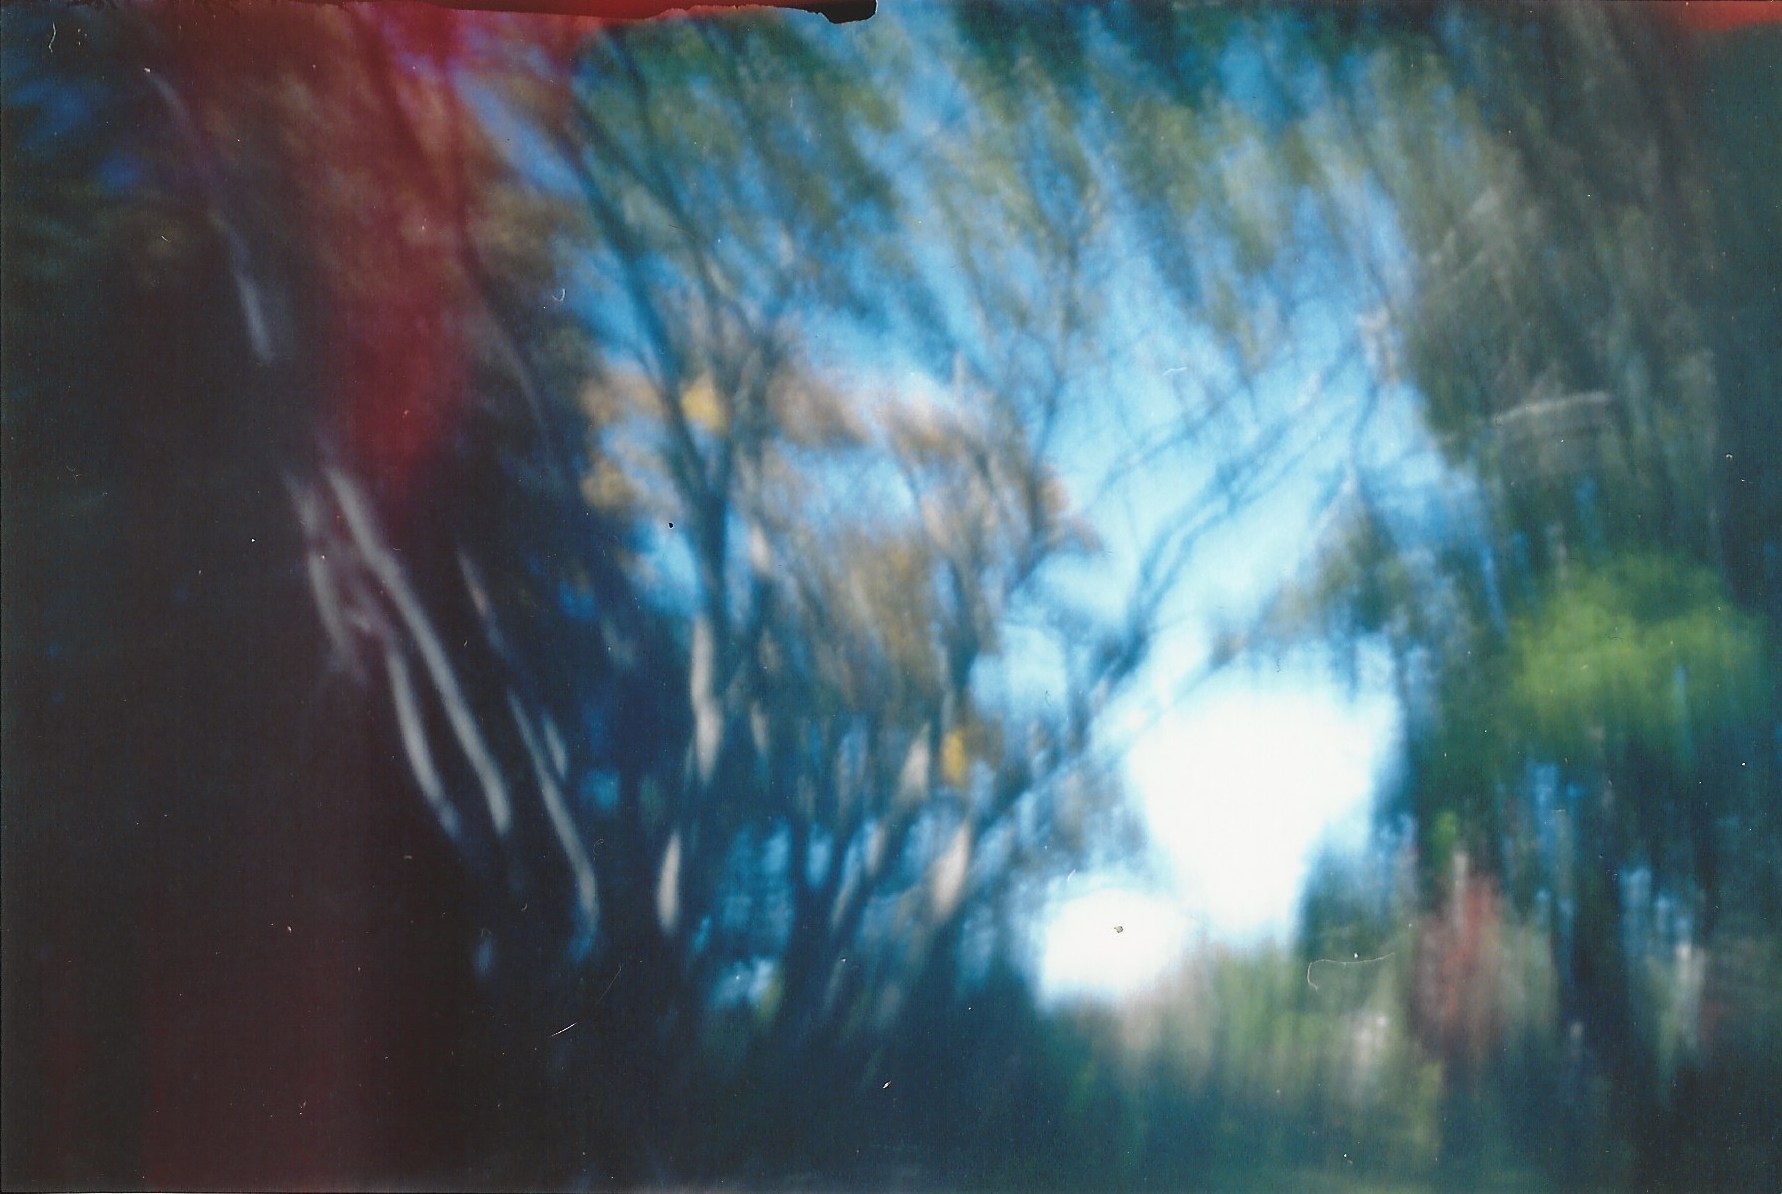
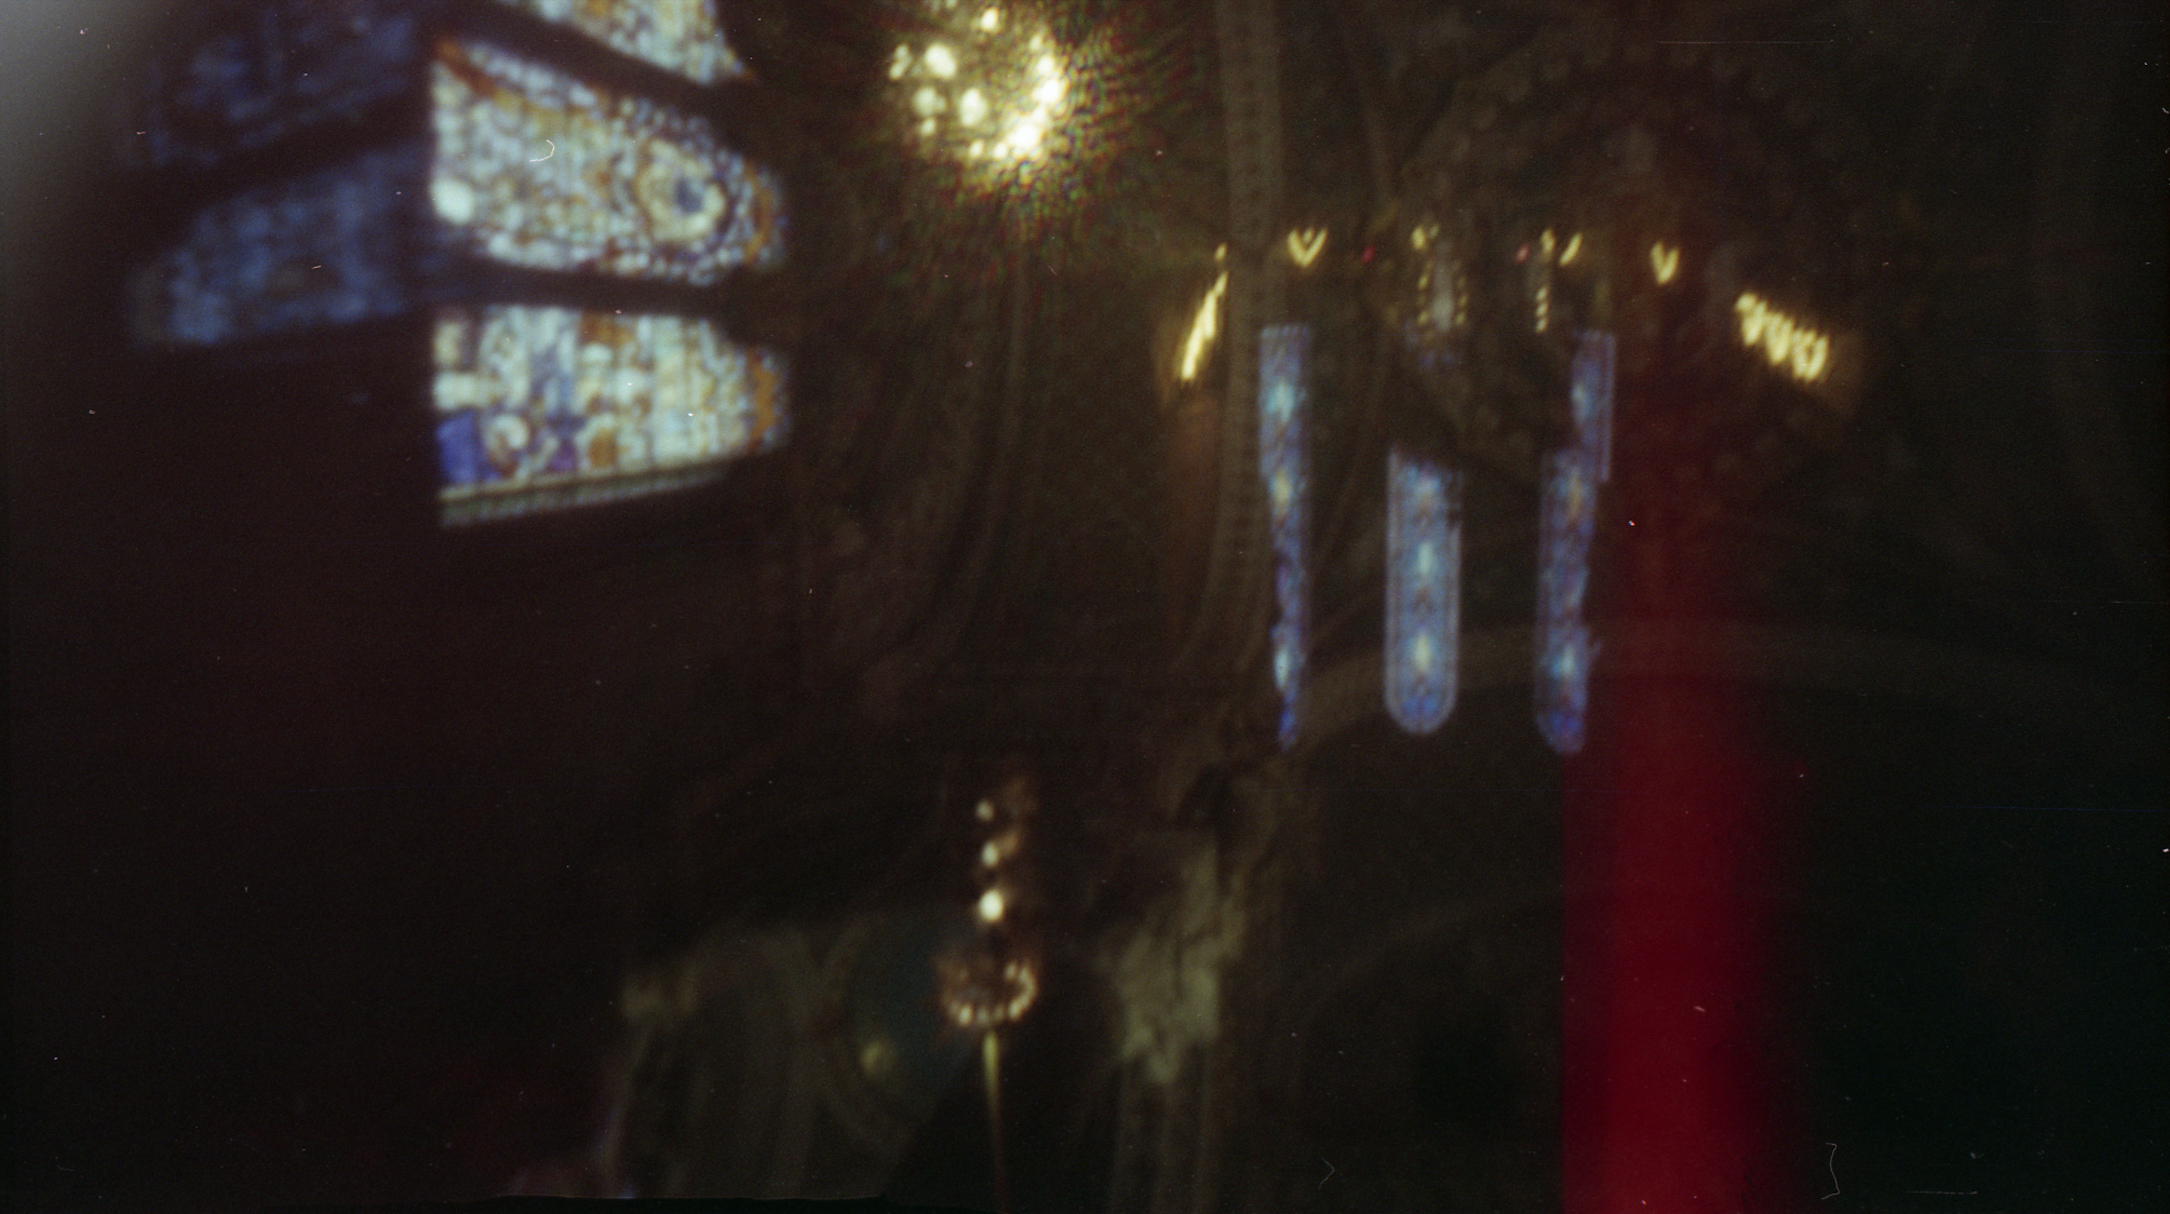
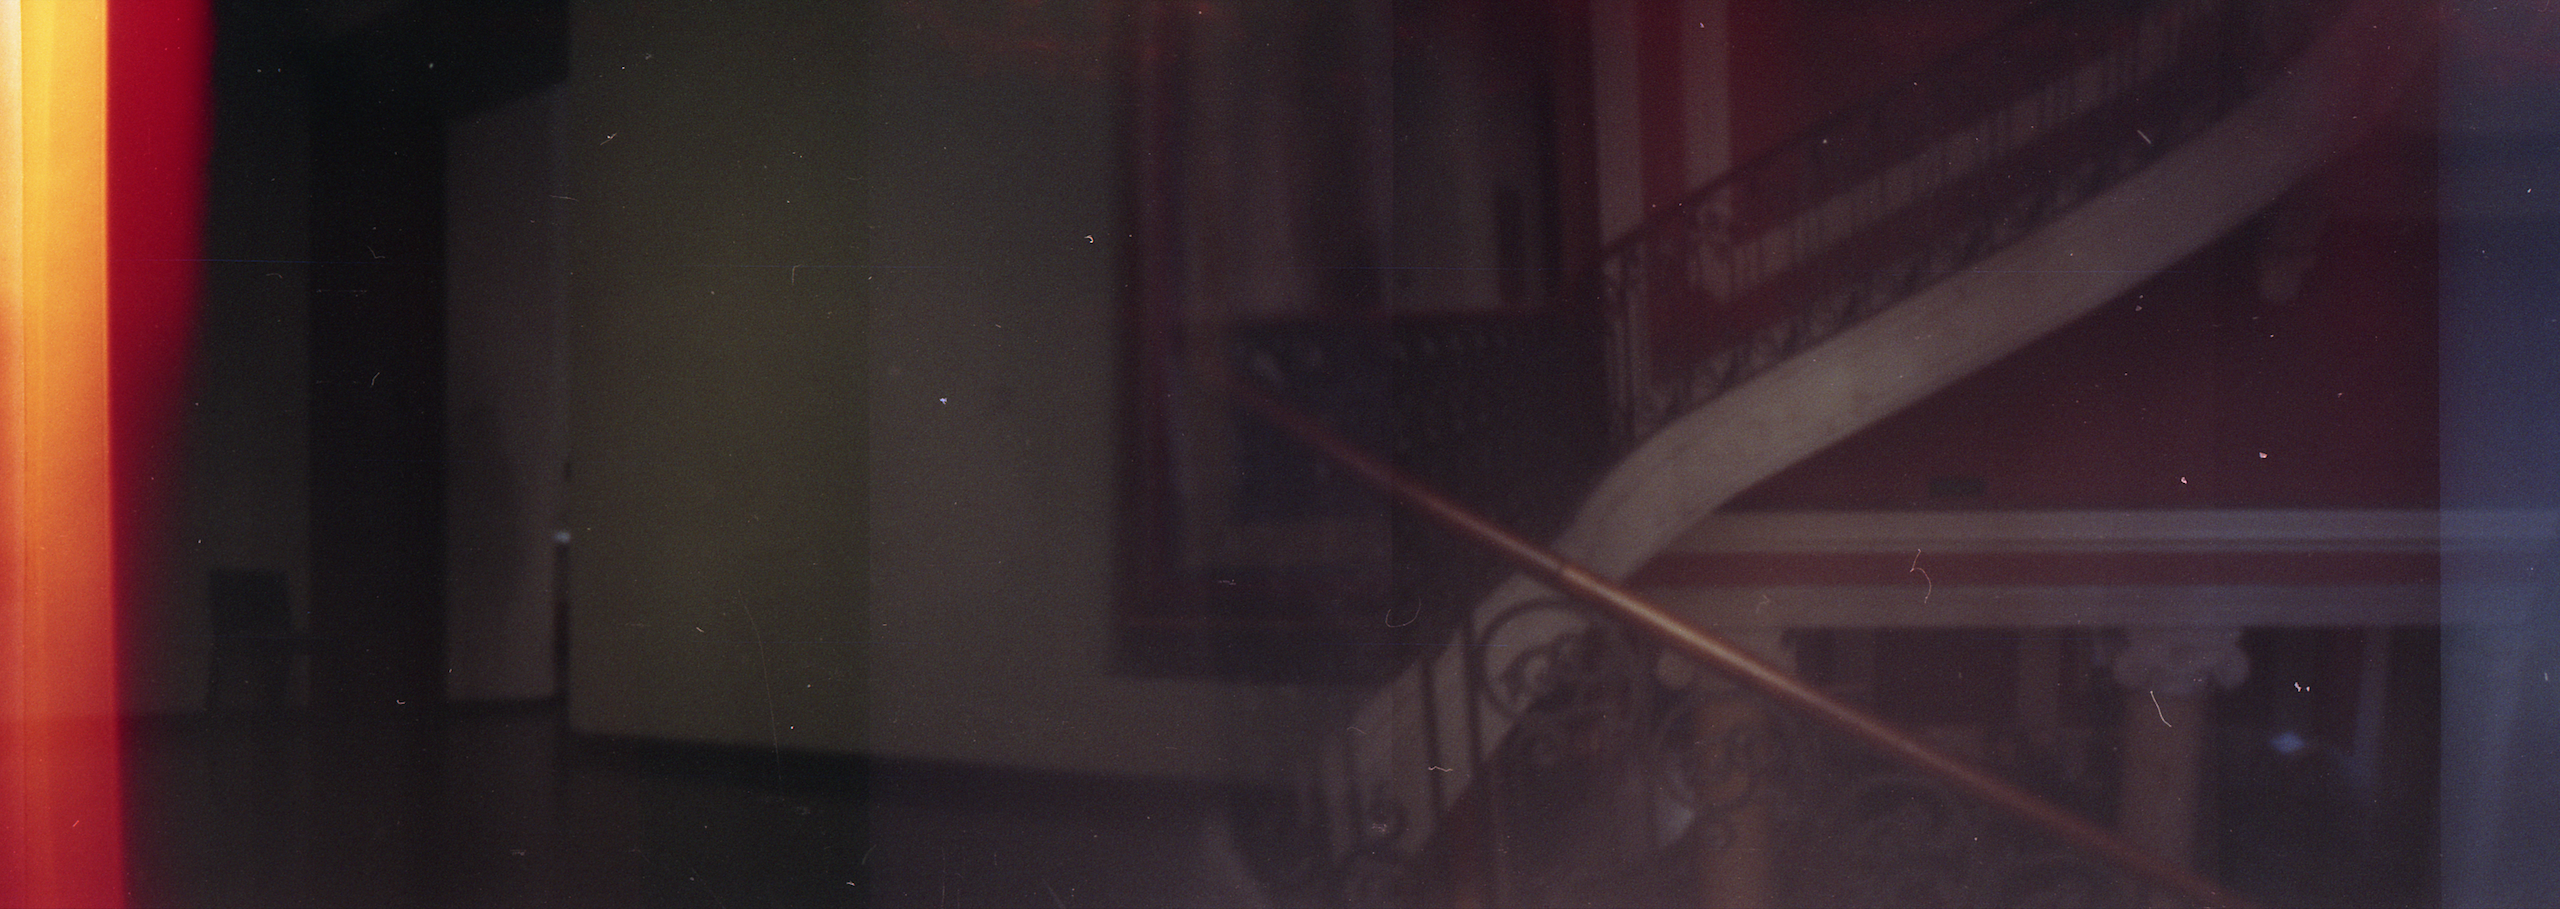
This type of photography is incredibly old, first written about in China around 500 BCE. Since then people have used hollowed all kinds of materials from chestnuts, soup cans, to entire rooms to capture subjects with shots lasting from seconds up to months at a time. Because these cameras rely on a small apertures rather than lenses with set focal lengths, pinhole photos have an infinite depth of field, which makes everything in the image to appear in focus.
This type of photography is pretty simple and governed by couple equations. One is the equation derived by Josef Petzval relating a camera’s focal length ƒ to the diameter of its pinhole d, and the wavelength of light transmitted to the film λ.
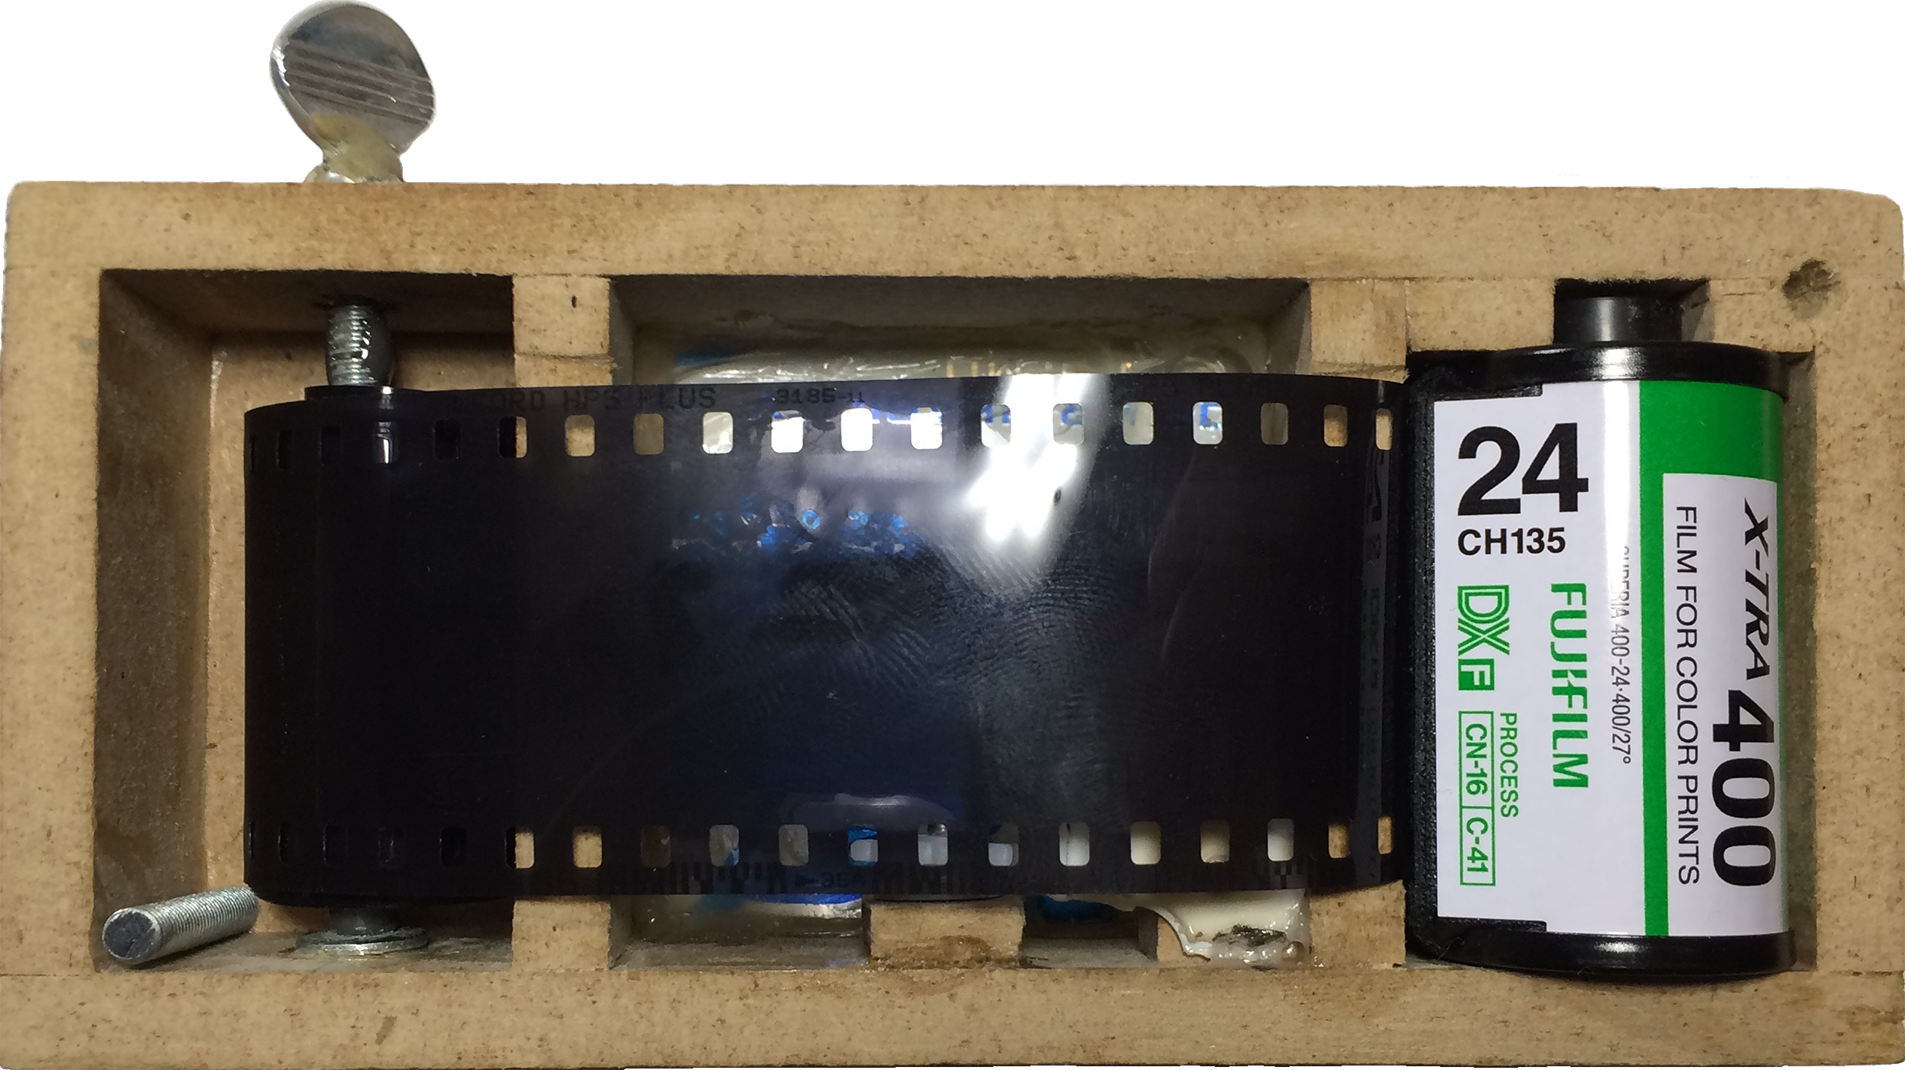
While I was really interested by the idea of building a camera from scratch, I knew I had to make something that was more portable, and that could take more than one exposure before having to be disassembled. Since photo paper is pretty expensive, and generally requires darkroom access to develop, I decided to use 35 mm film. The field of DIY photography is nothing new, and there are even kits you can buy that included everything you need to make a pinhole camera with craft supplies.
What I was most interested in when making my own was building something that could be immediately recognizable as a camera. If I could build a box to have the affordances of a point-and-shoot camera—if it was clear to a new user that a certain knob would advance the film, and that a certain button would take the photo—I’d know my design was successful.
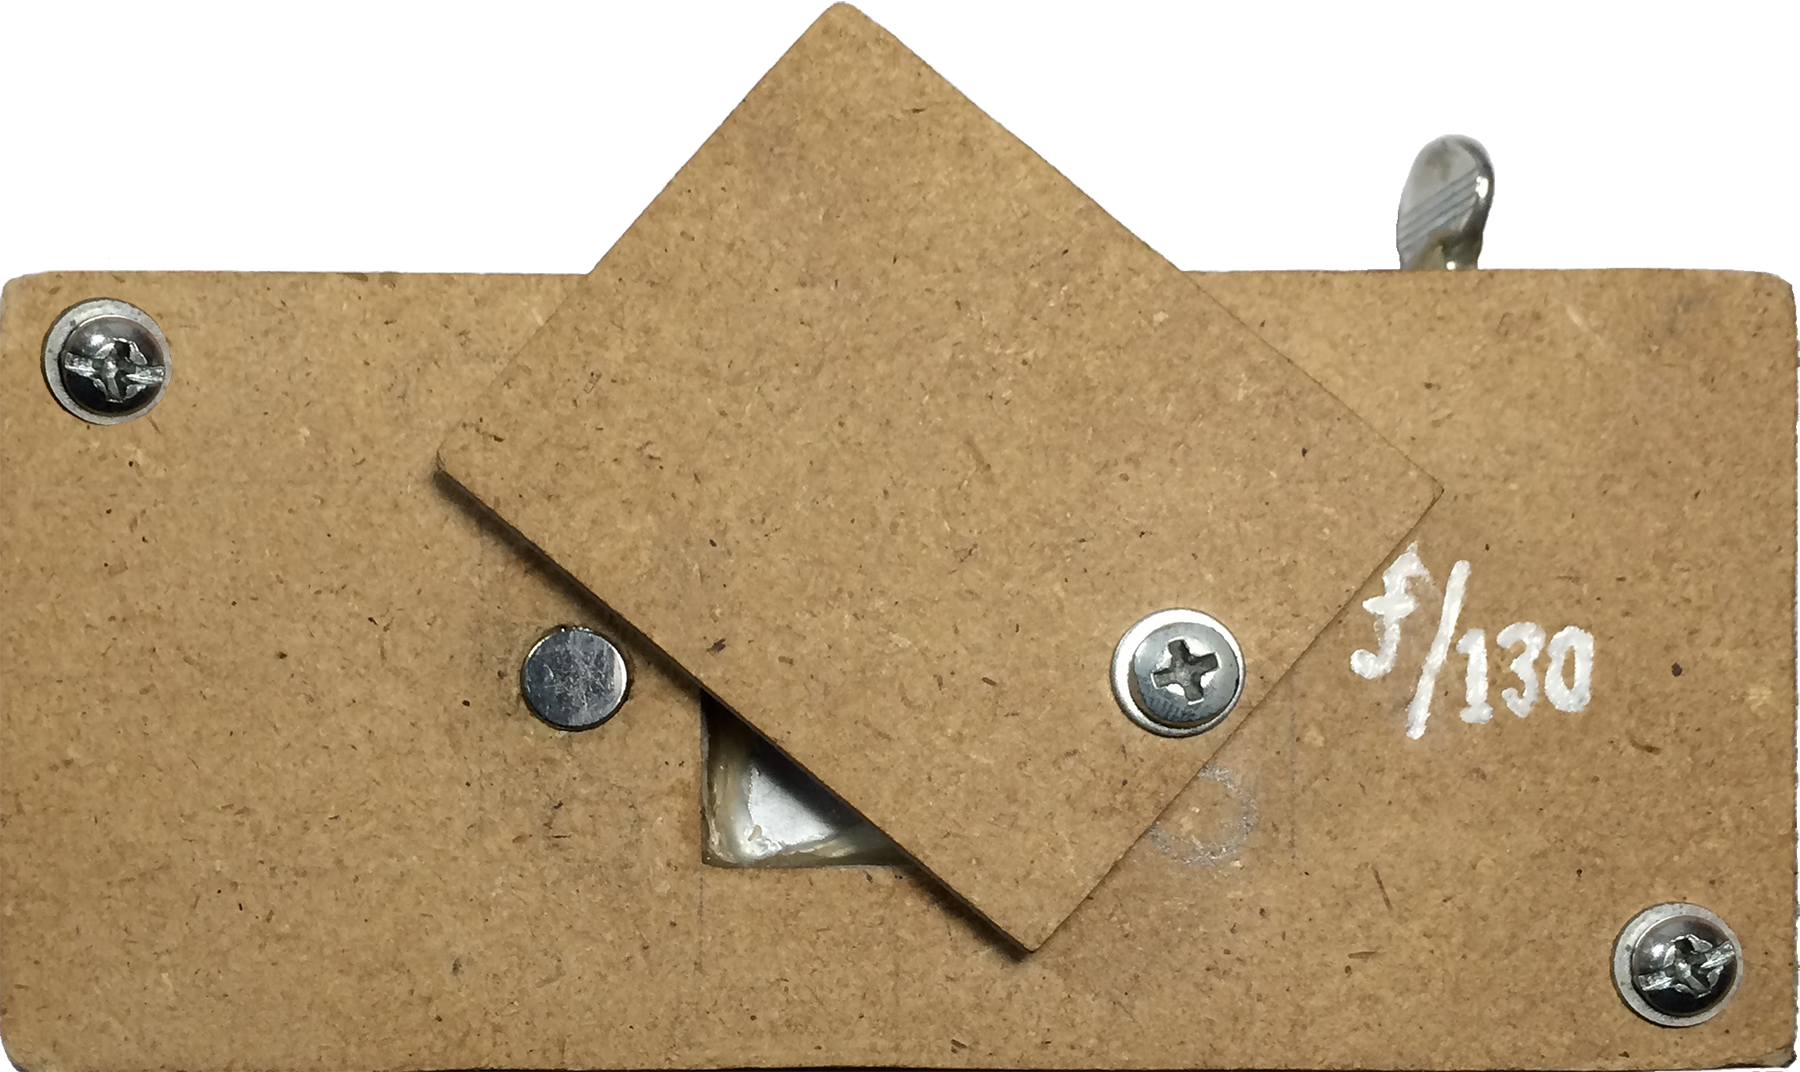
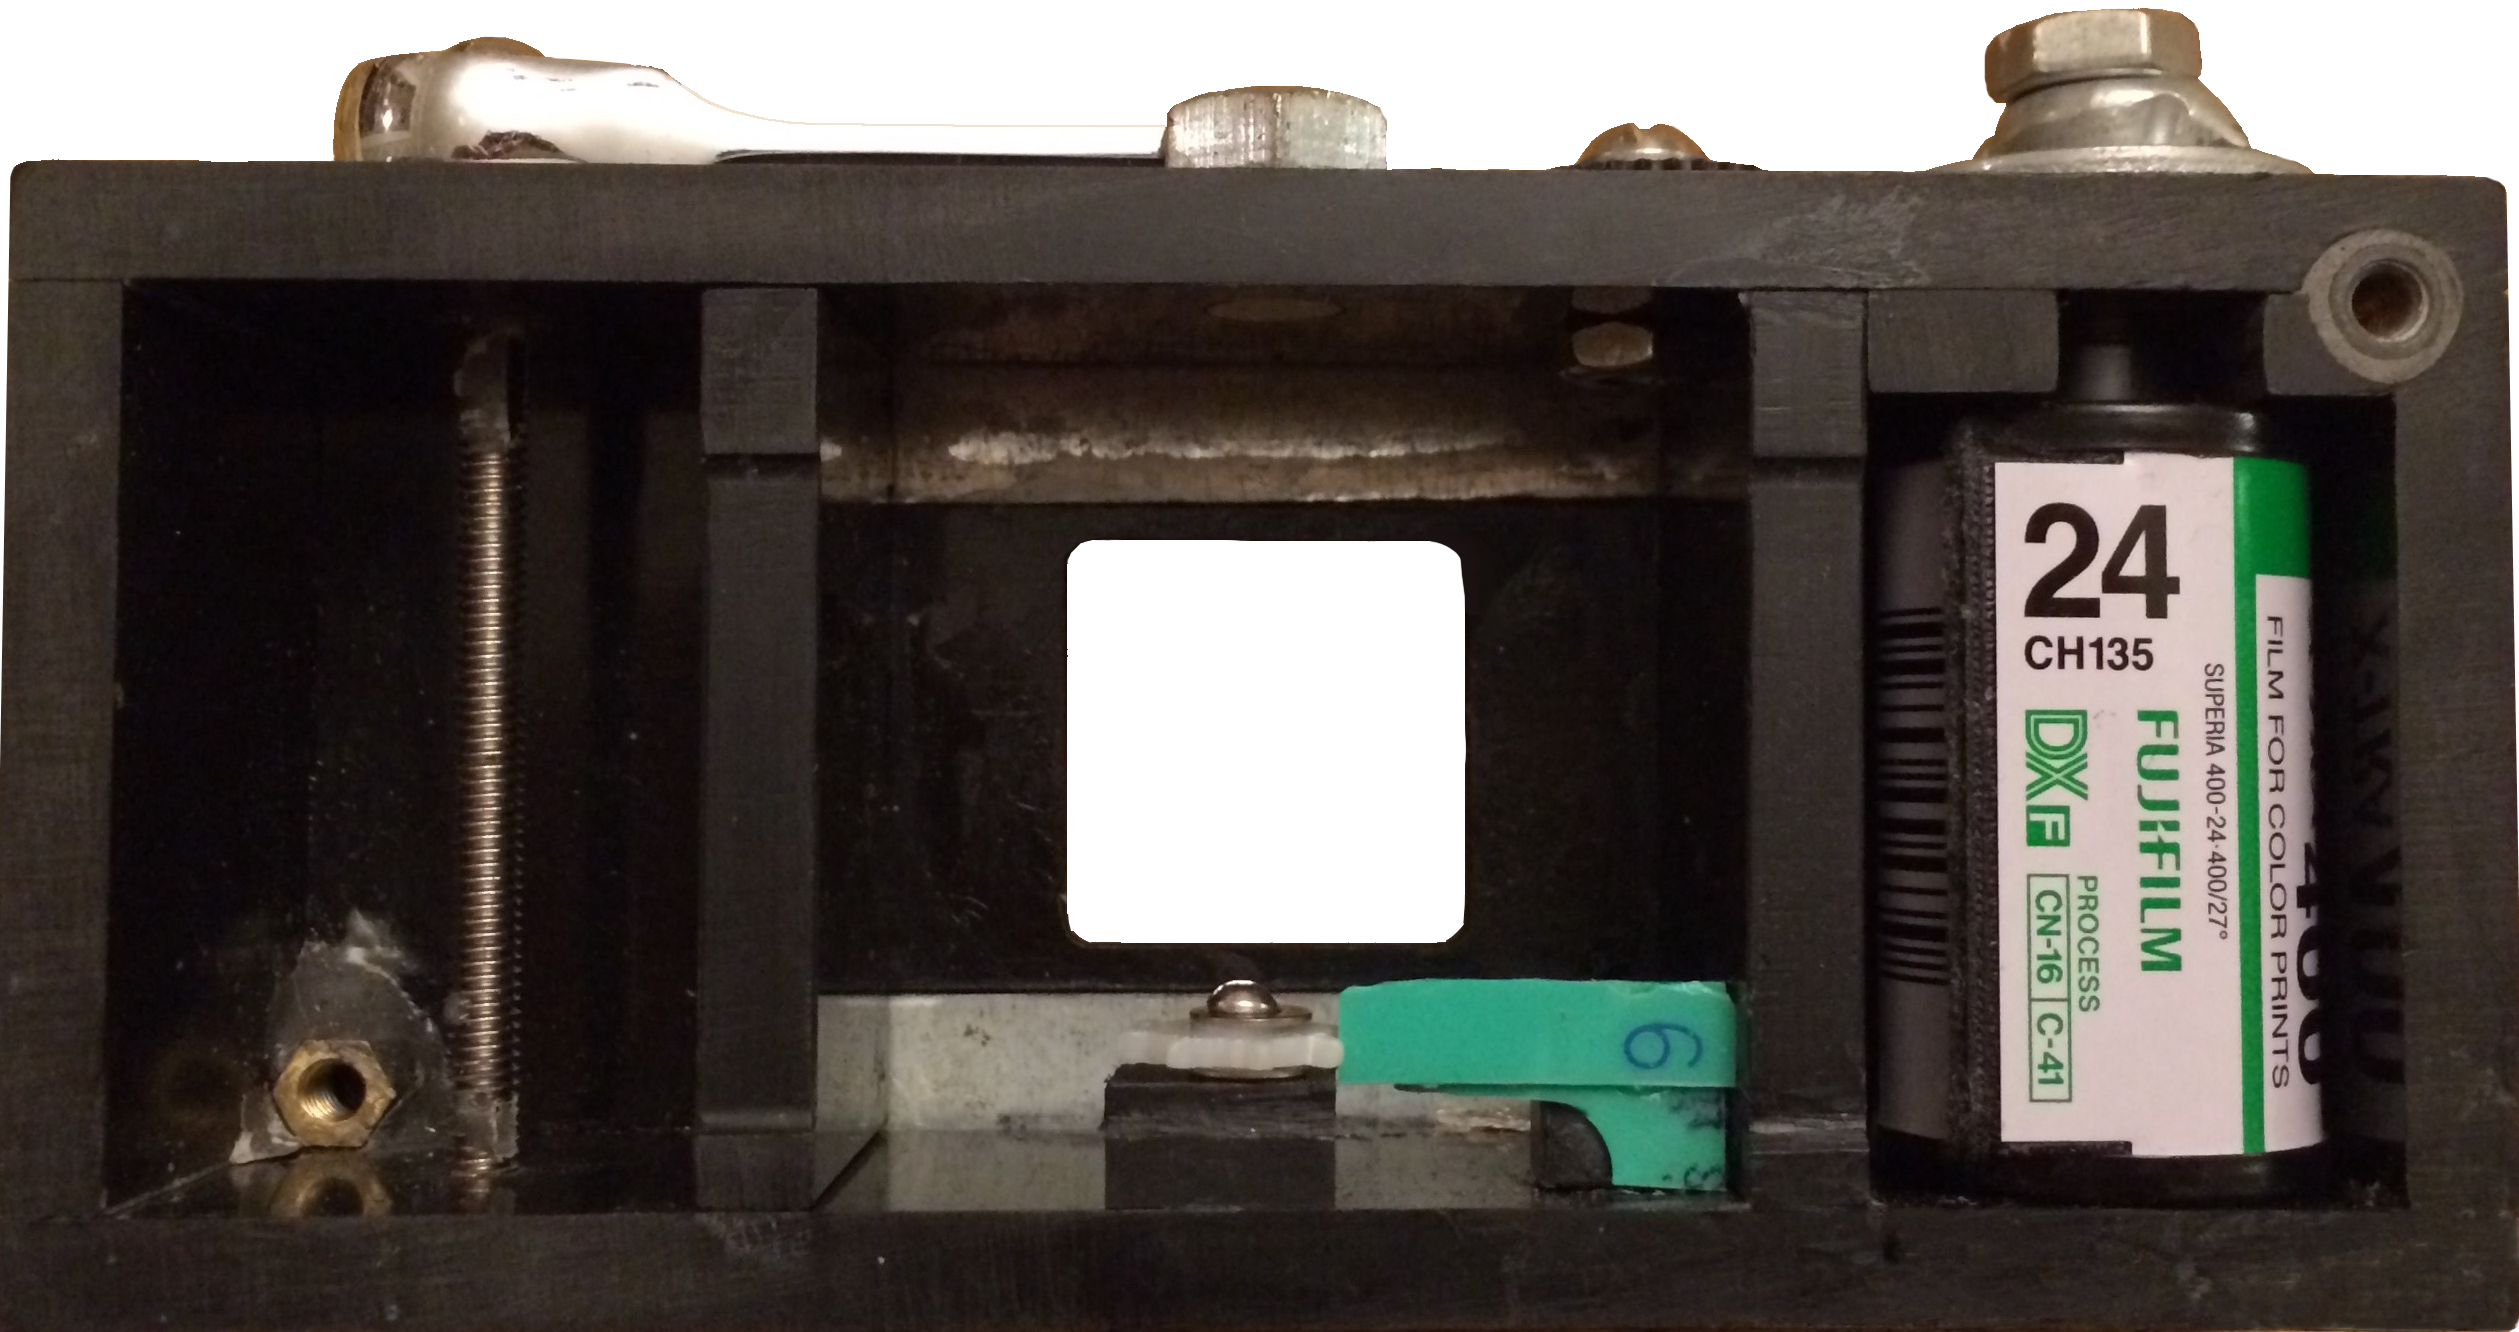
My first stab at this consisted of a box I made with 1/4-inch fiberboard with some hand tools. I added partitions to separate the inside of the box into three sections. The first serves to hold the 35 mm film canister, the second as a stage to frame each exposure, and the third to hold exposed film from previous shots. By twisting a thumb screw, the user advances the filmafter each photo. Taking a photo consists of flipping up the wood shutter to expose the pinhole.
To determine how far to advance the film for each photo, this design relies on the perforations can are standard in 35 mm film. I build a basic ratcheting mechanism with a sprocket so that the film rotates a sprocket as it advances, each tooth catching on a plastic flap that clicks eight times per frame. By listening for eight clicks as you advance the film, the user can be tell where the film is in the camera. This admittedly isn’t the most elegant solution to the problem, and I’ve since improved the film advance mechanism. At the same time, the photos that come out of this camera can come out nicely.
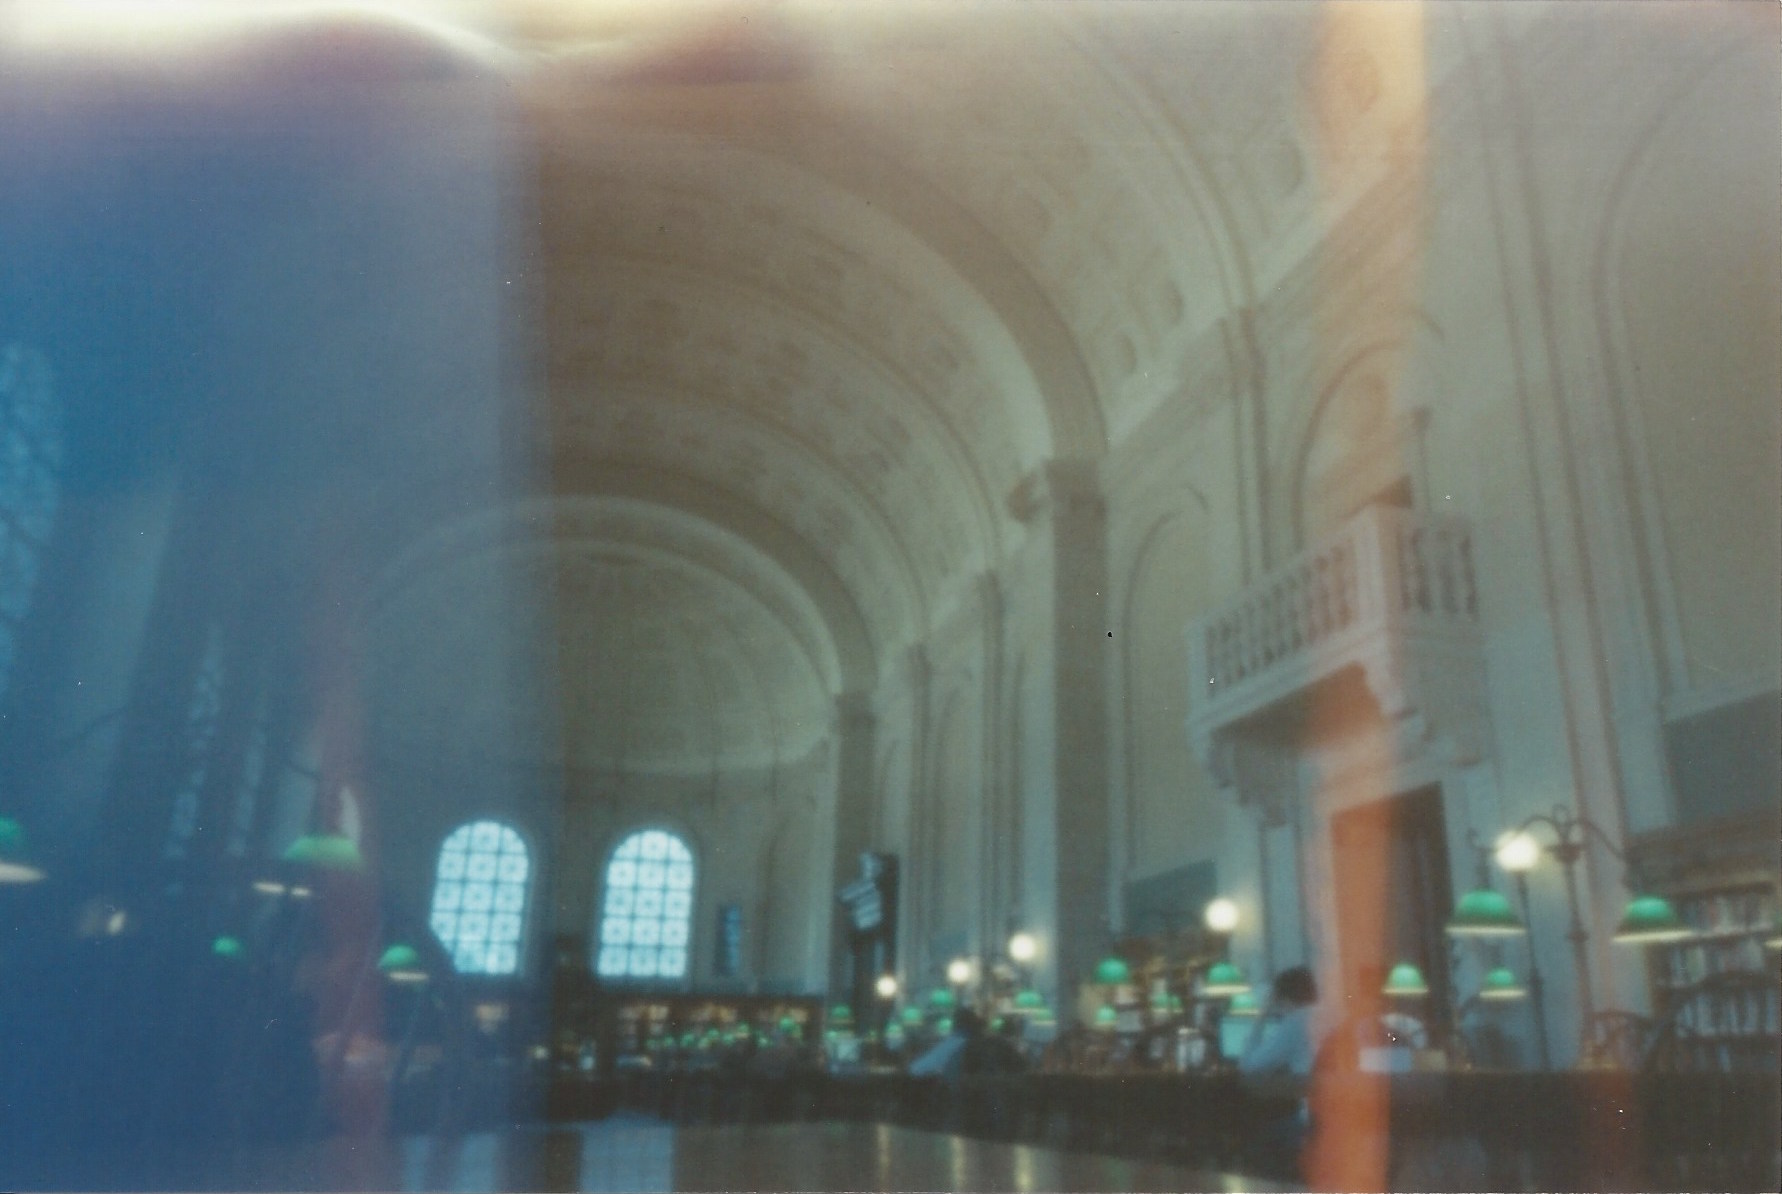
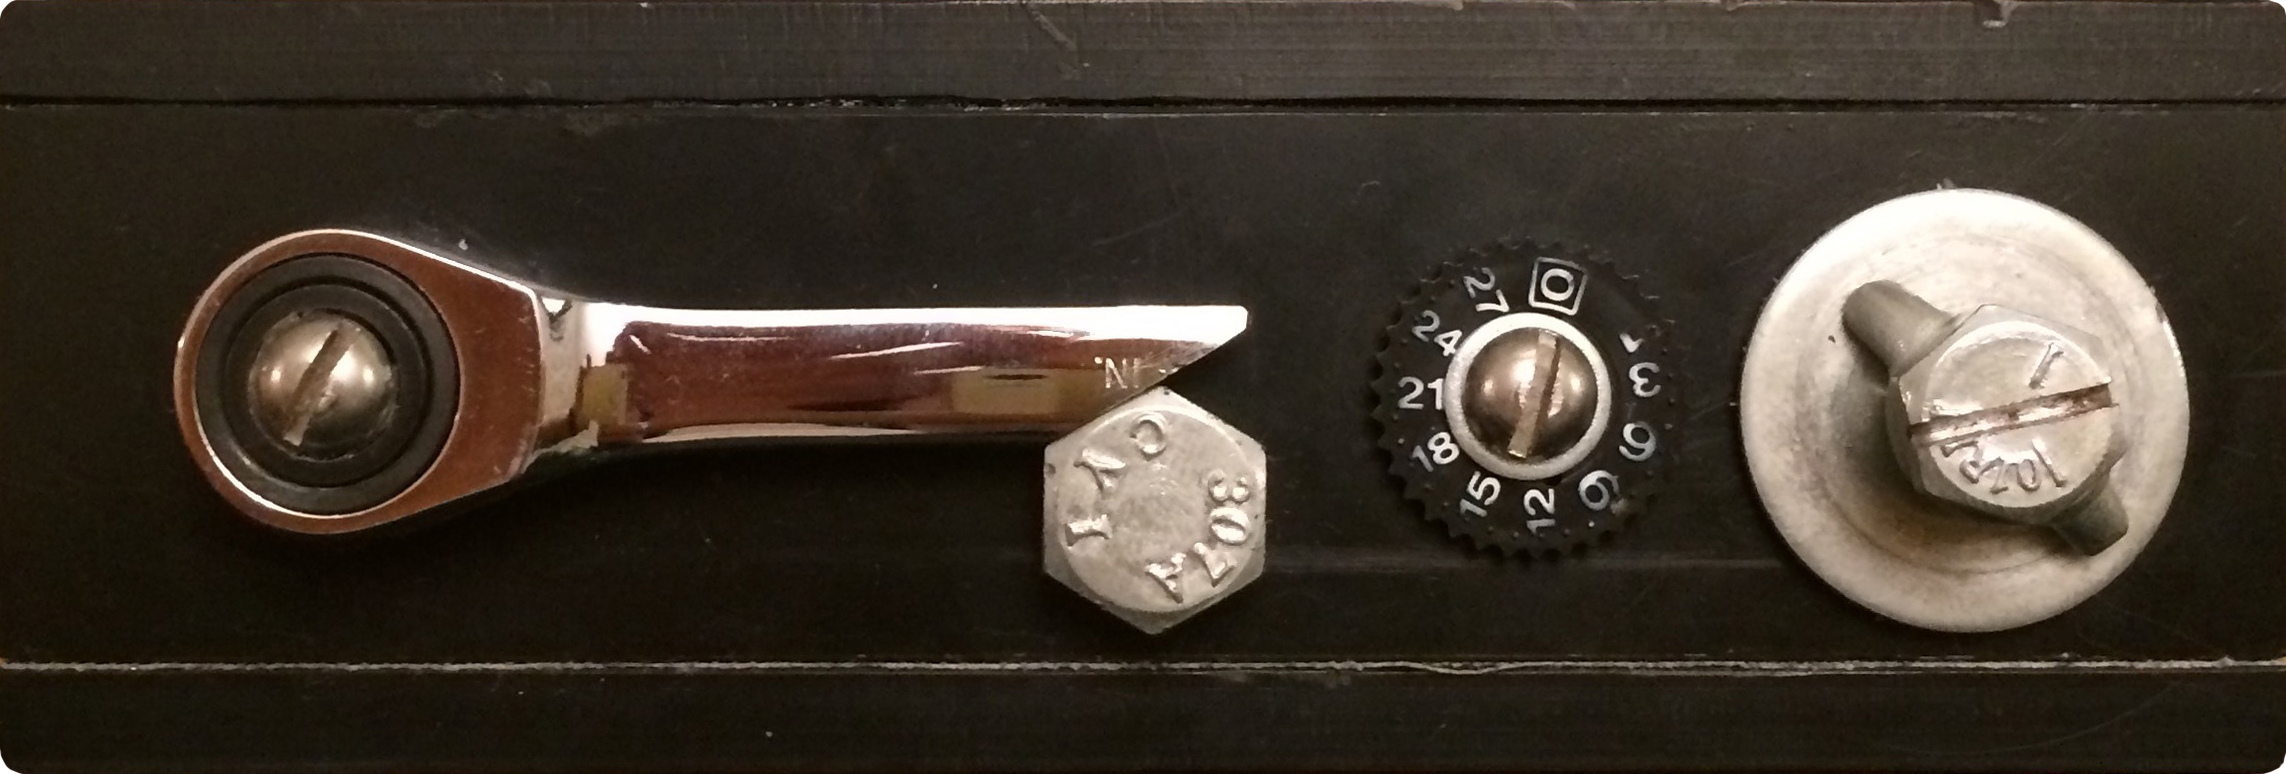
I found that a lot of photos I was taking with the wood camera were outdoors, lots of times in the rain. For the sake of making a more rugged camera, but also as an opportunity to try design a new way of advancing film, I set out to make a second iteration out of black HPDE plastic. By milling the plastic on a CNC mill, I was able to get more precise pieces that I made into the body of the camera. This time around I included a shutter that slides along grooves in the frame, and is held in place by magnets. I made a film advance knob with a ratcheting wrench that the user can crank roughly one time for each frame. The wing nut is used to rewind the film, and the, and the numbered wheel can be manually set to indicate the number of remaining shots. While the film advance works as it should, I believe it’s more trouble than it’s worth, and the overall design is more complicated that it needs to be.
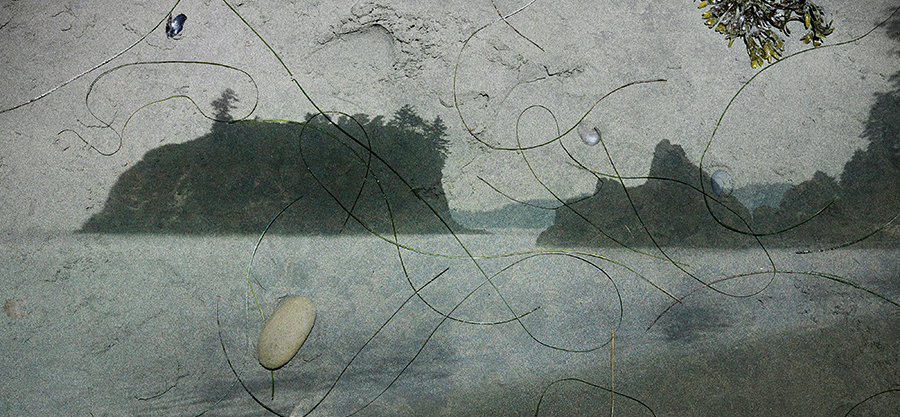
The photos that I shot with this camera tended to have more light leaks and that the ones I took with the wooden one, which on the one hand is problematic, but also lends a pretty distinctive quality to landscapes and double exposures, for example.
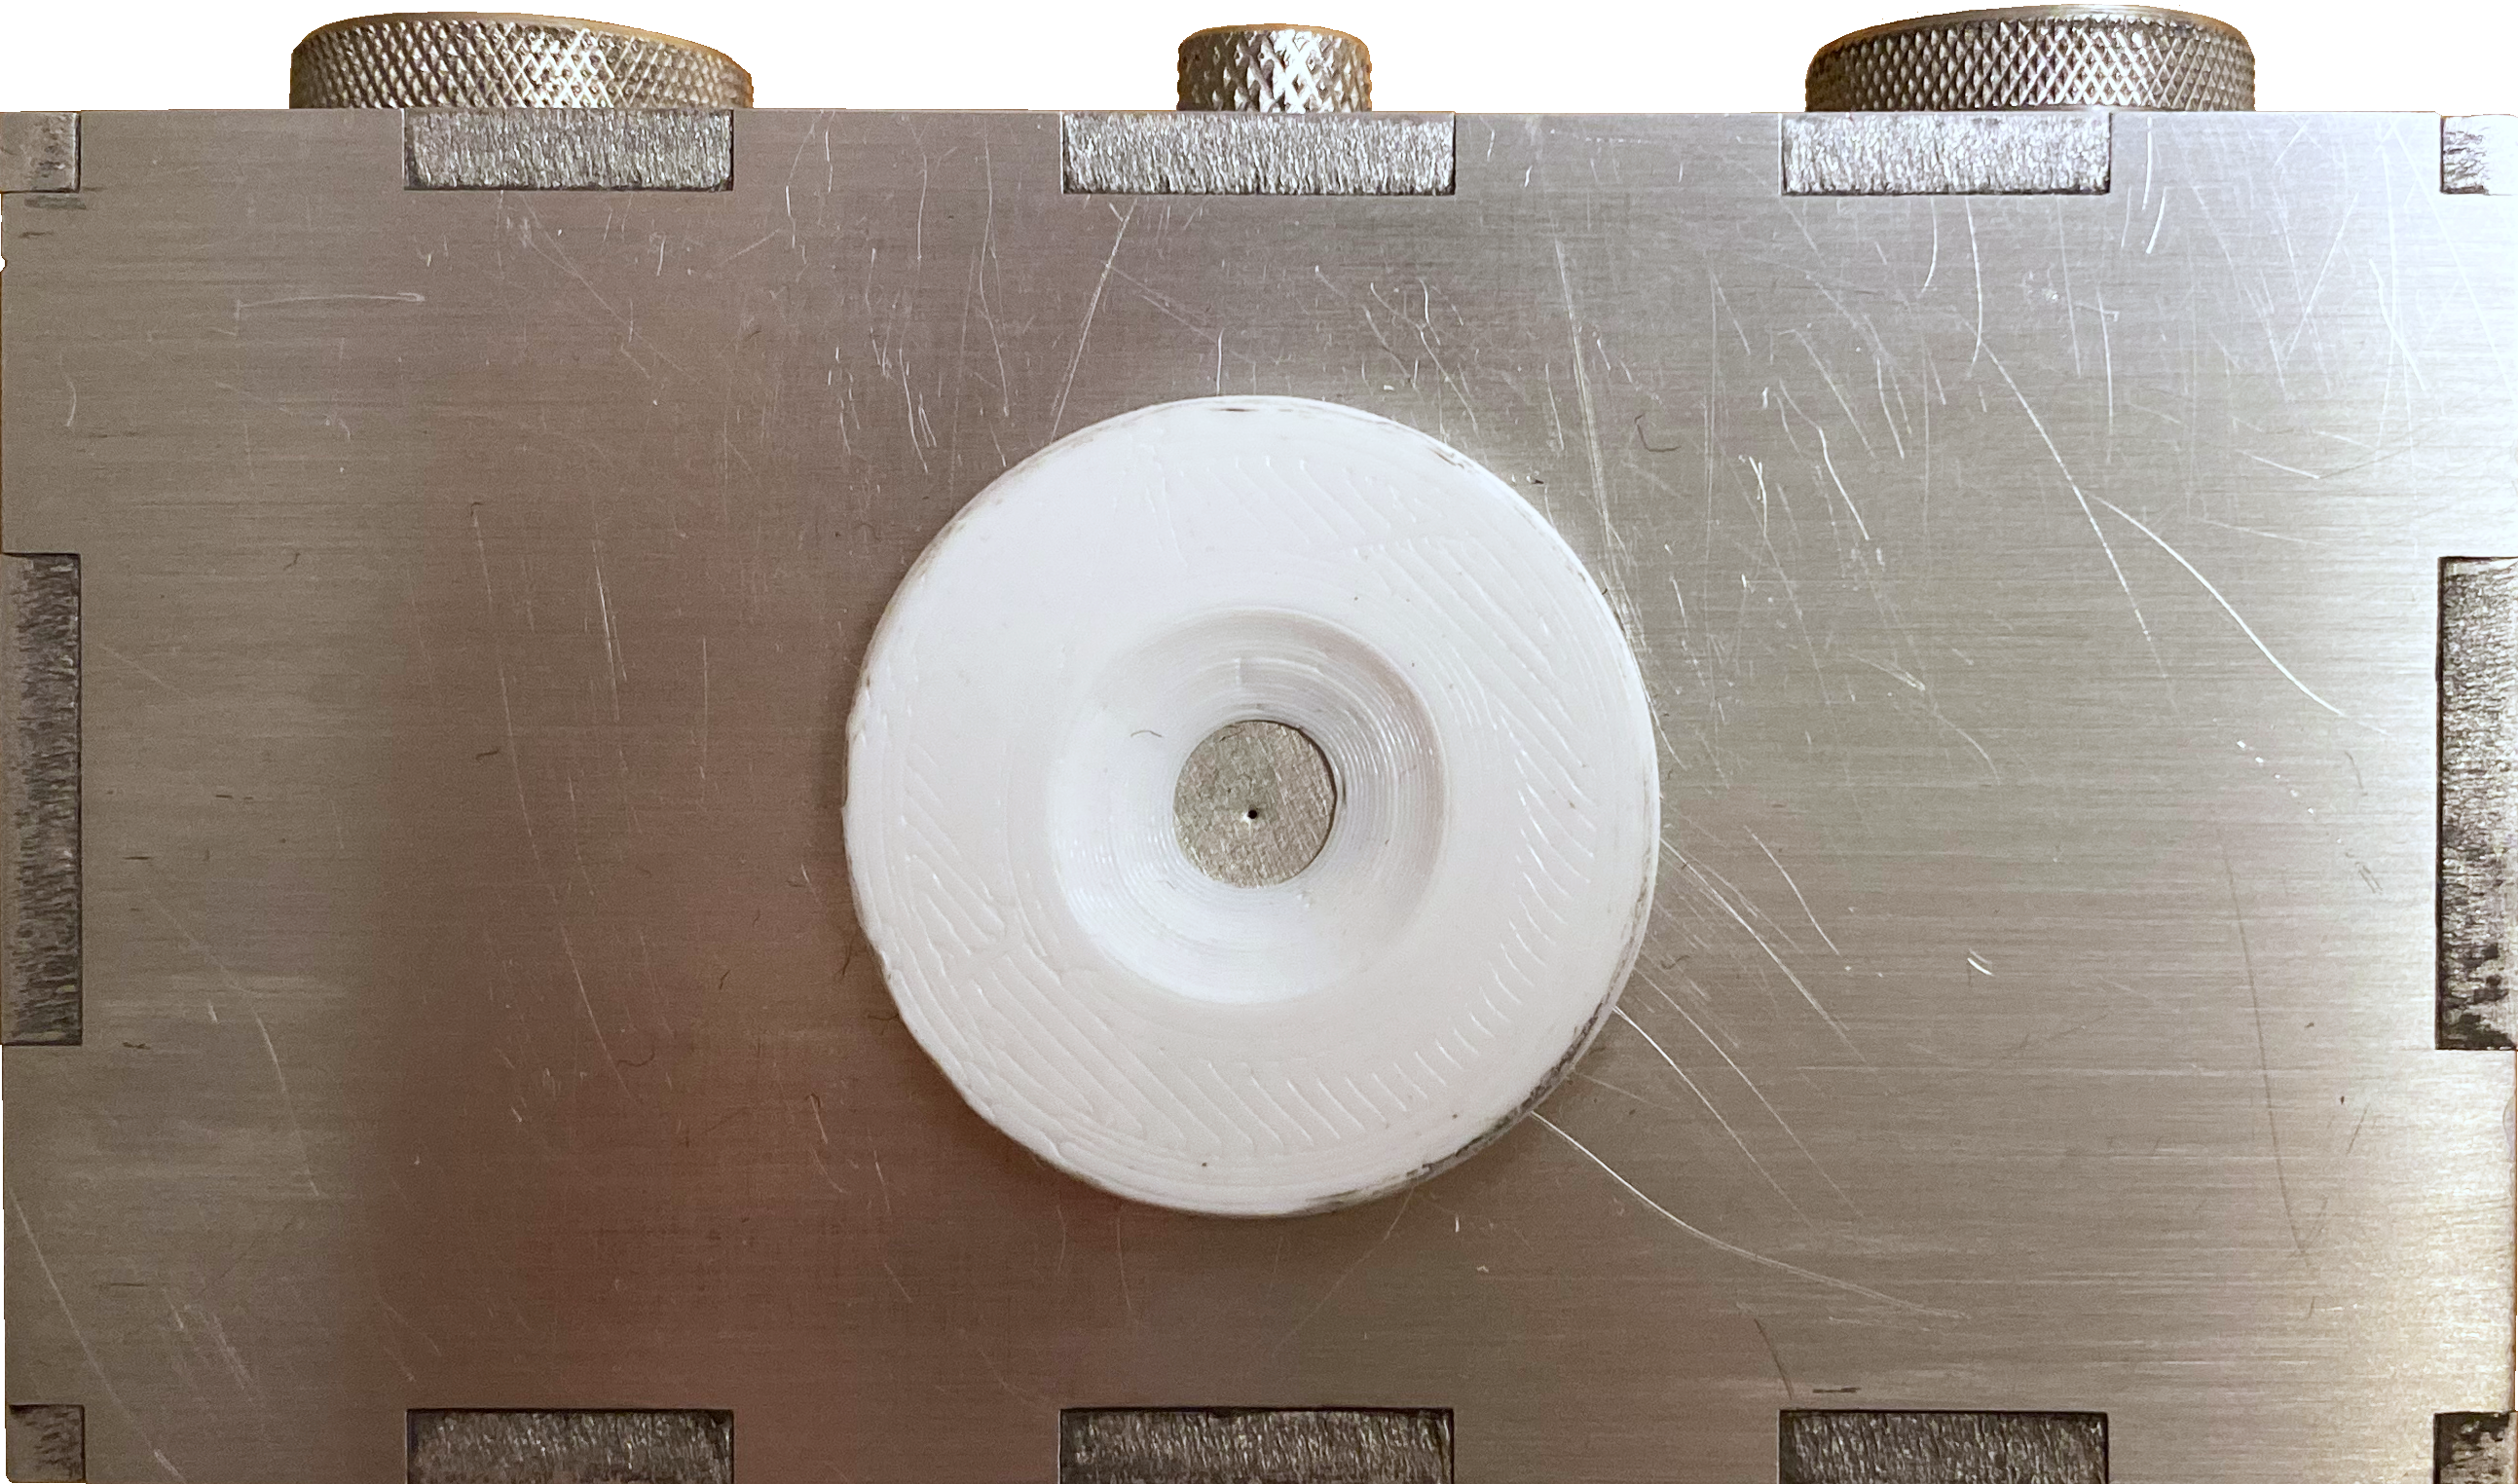
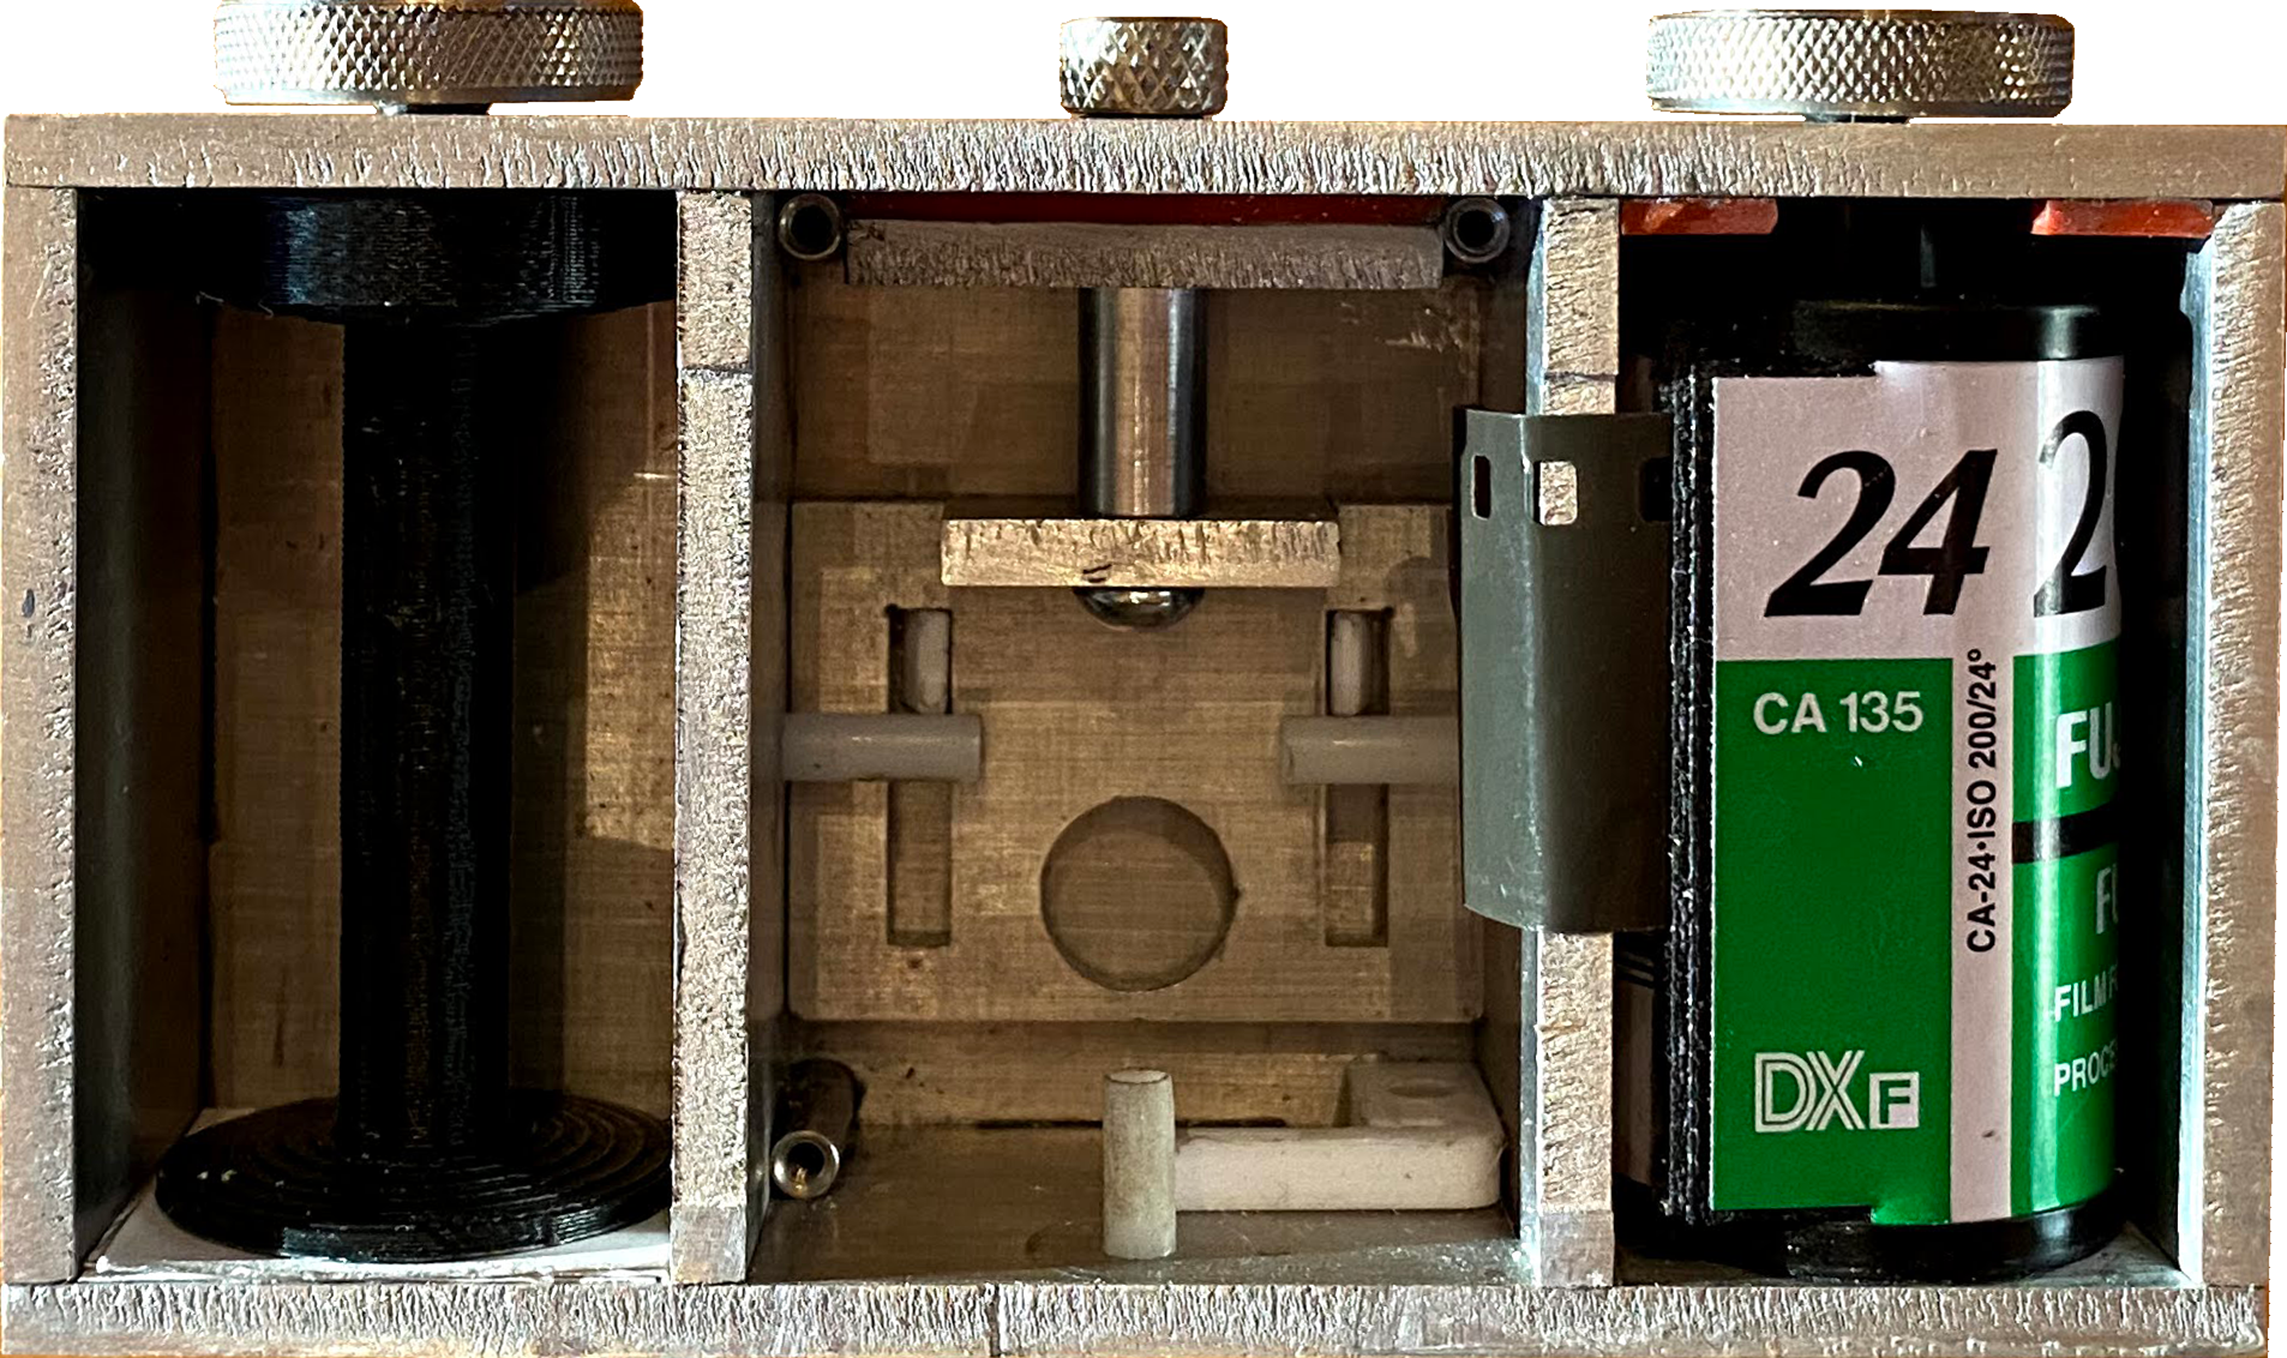
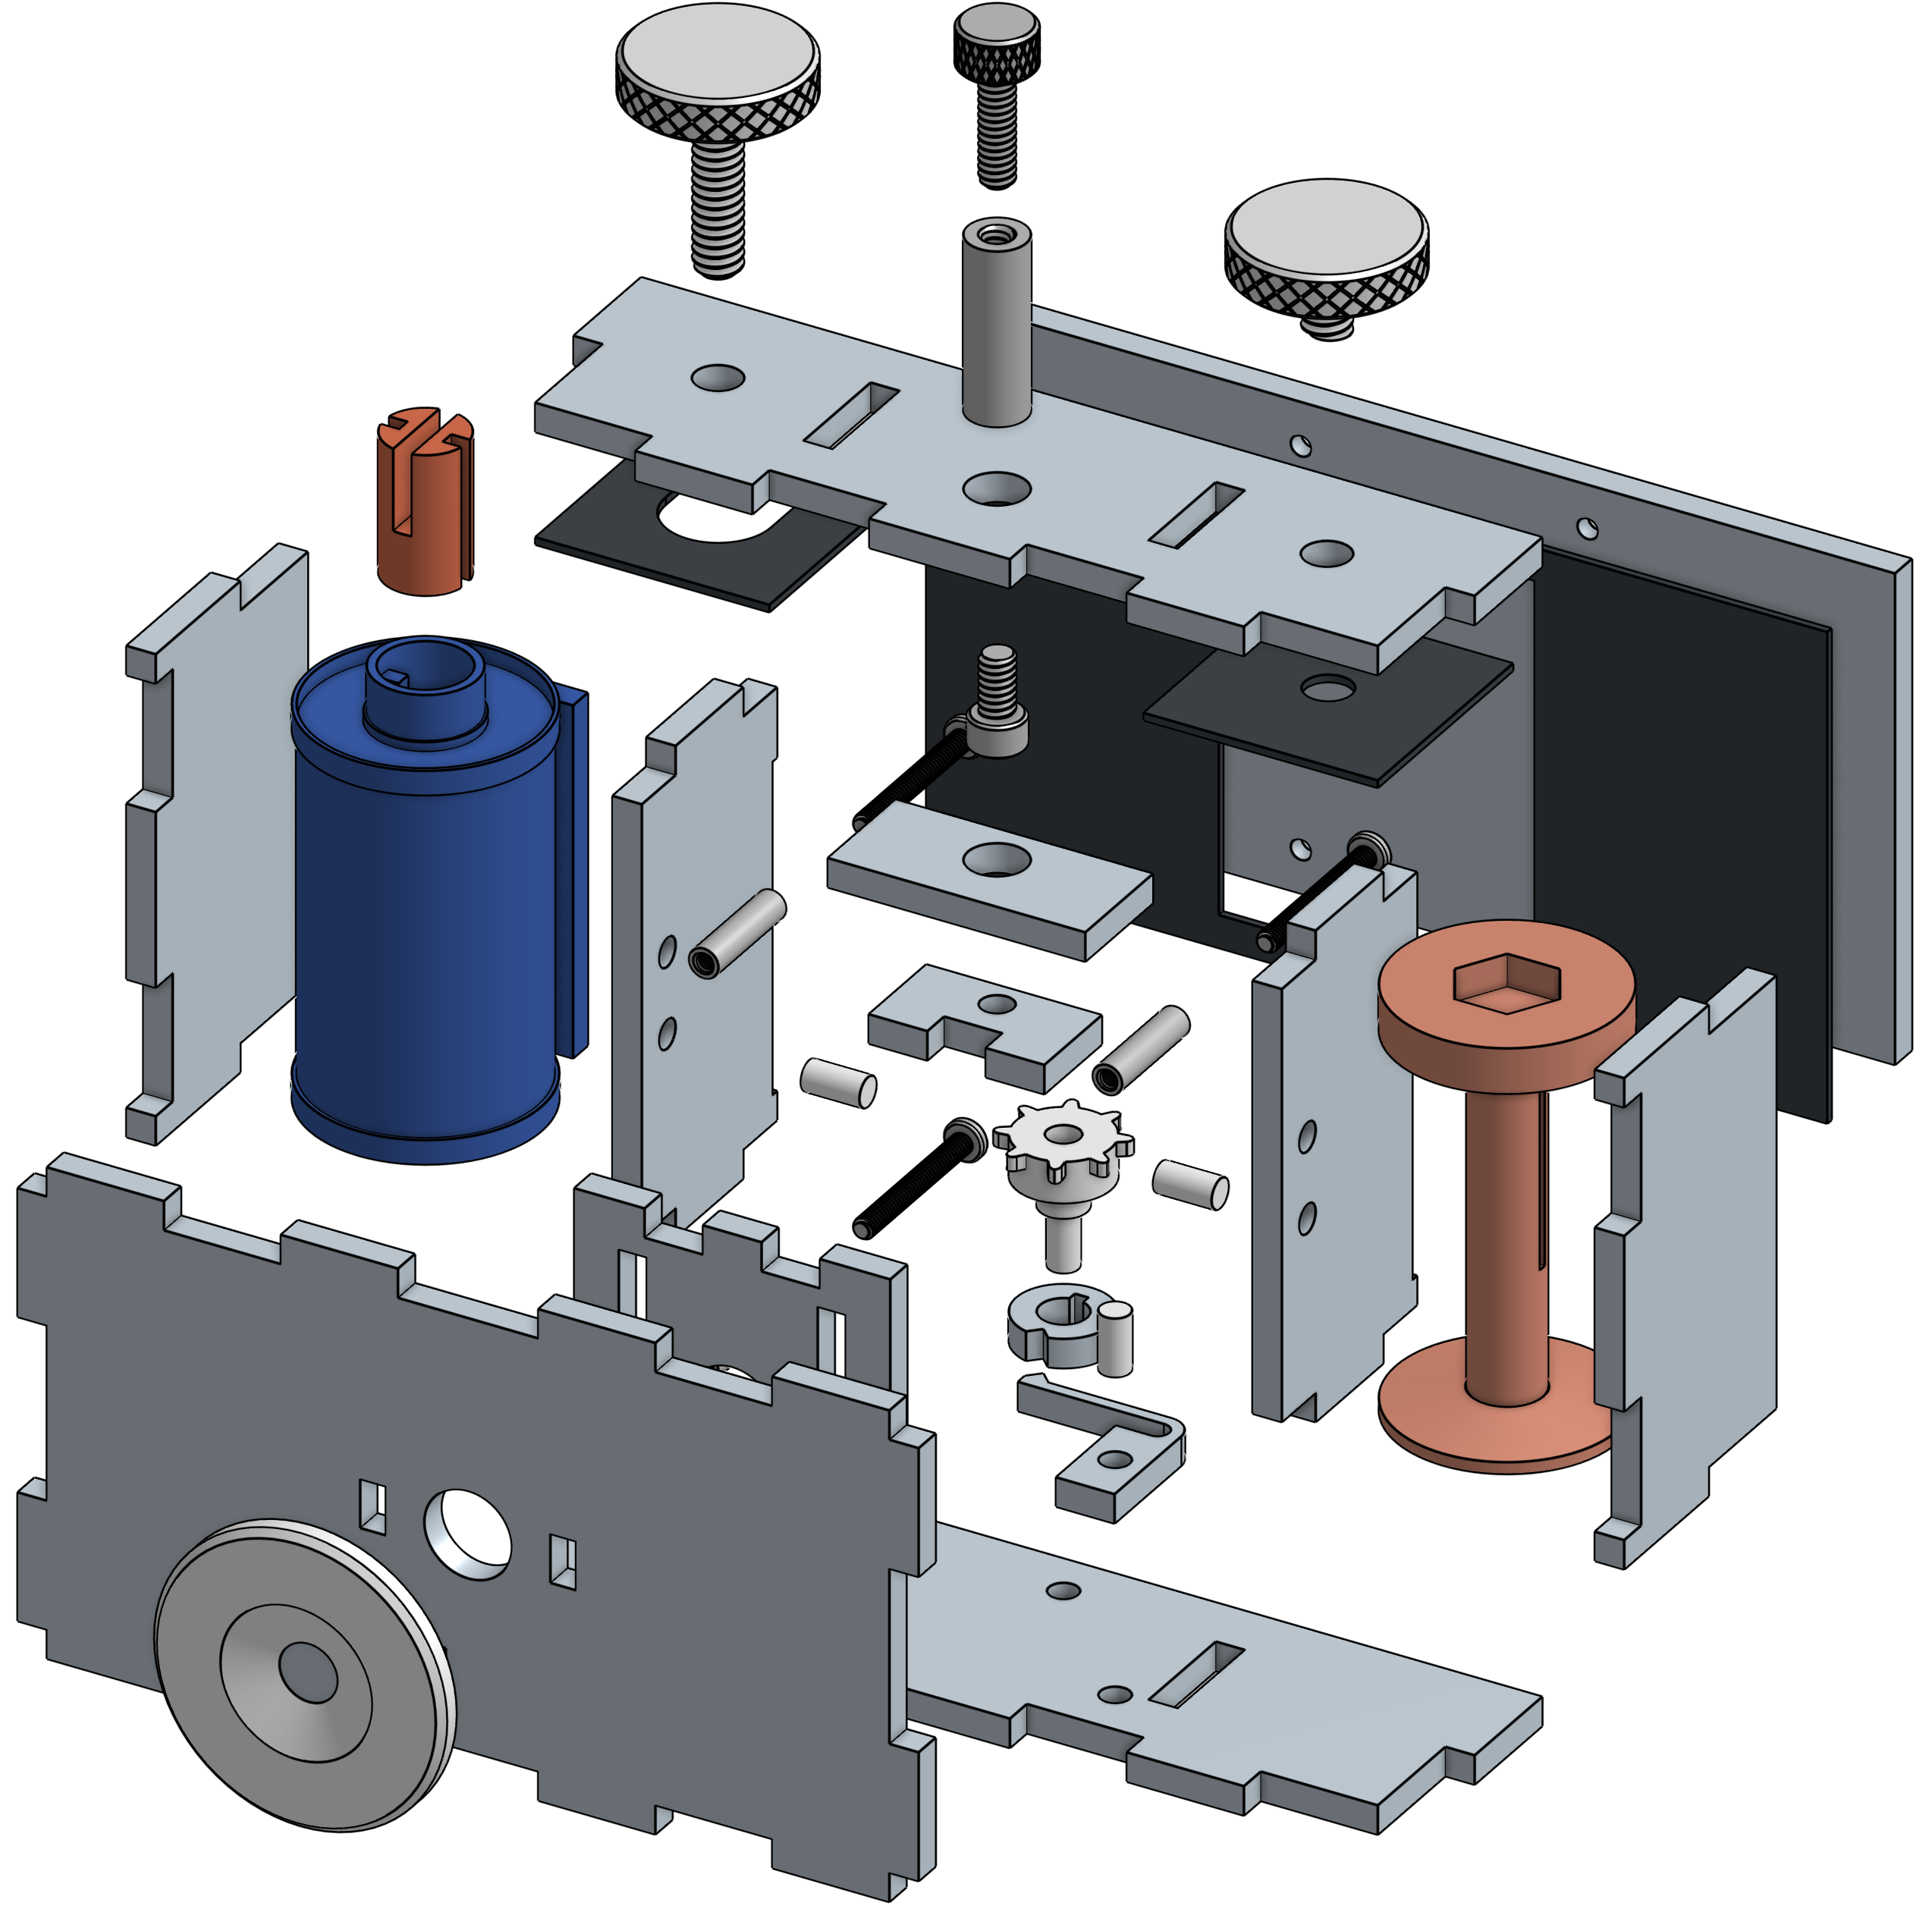
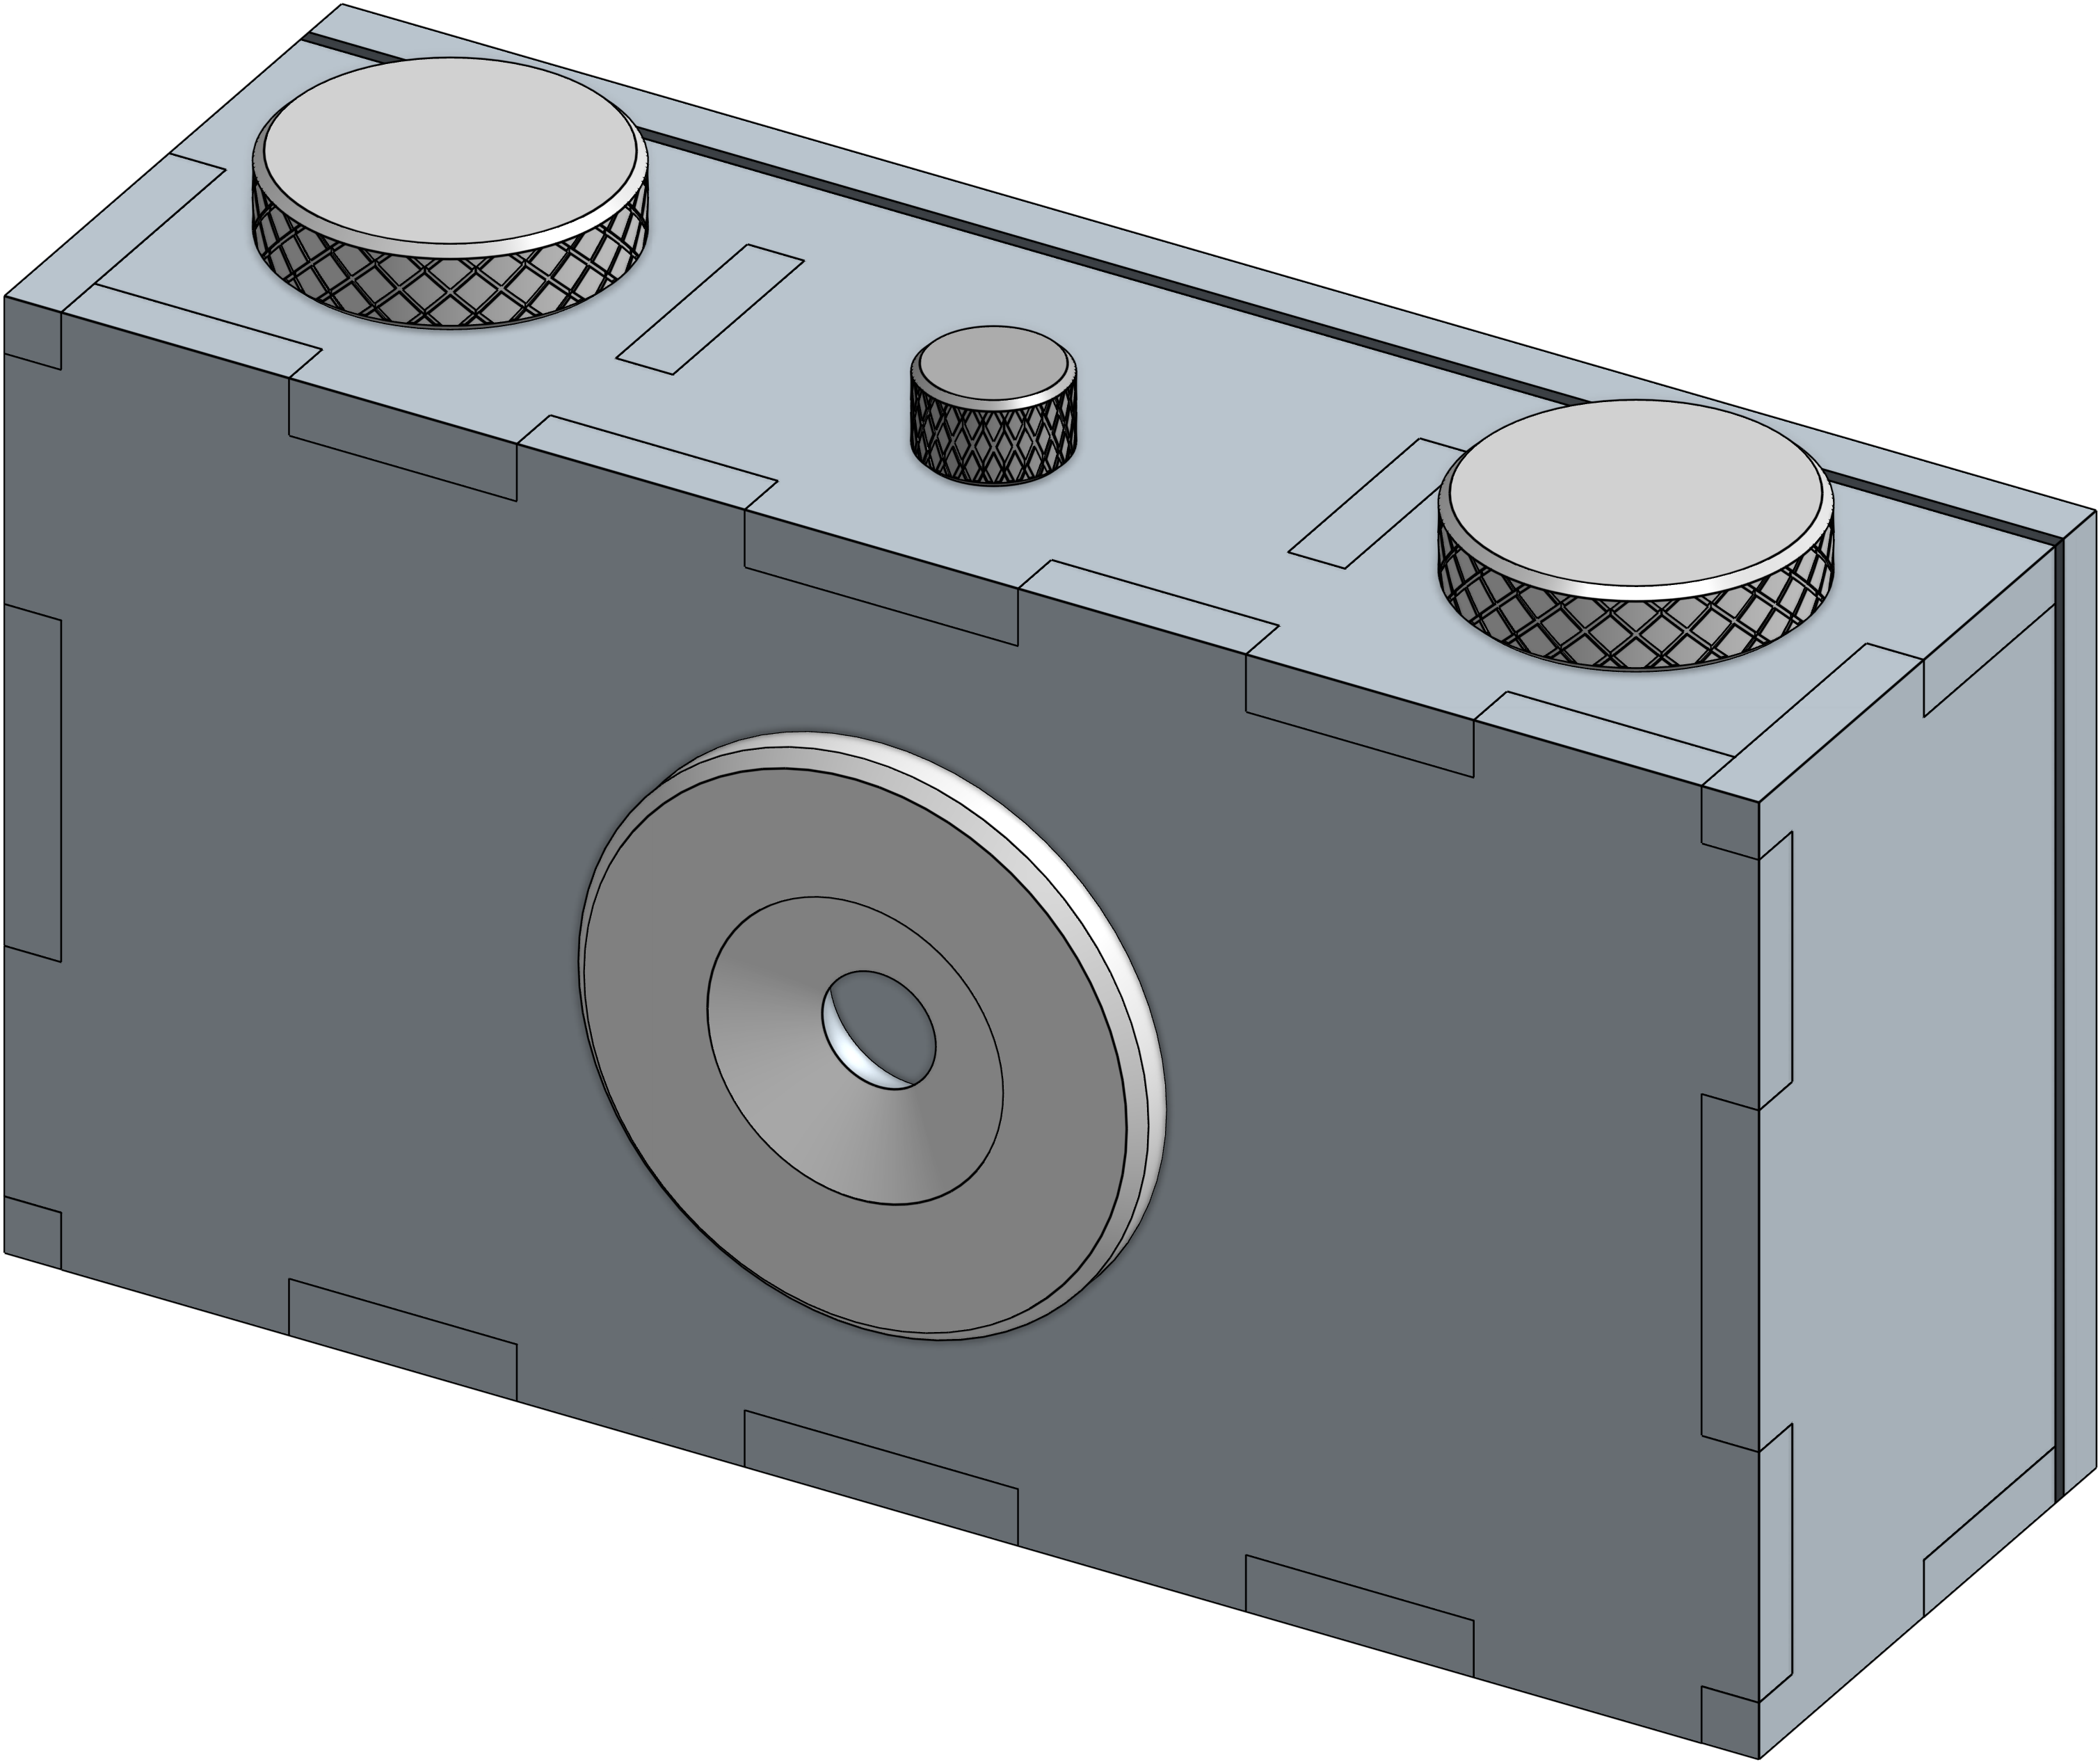
Most recently, I designed a built a smaller camera made from 1/8” aluminum sheet that I indented to be much simpler and (hopefully) elegant than its predecessors. With the help of a 4500-Watt laser cutter, I was able to cut pieces that would fit together at precise box joints. Steel thumb screws were used for the film knobs and the shutter pull.
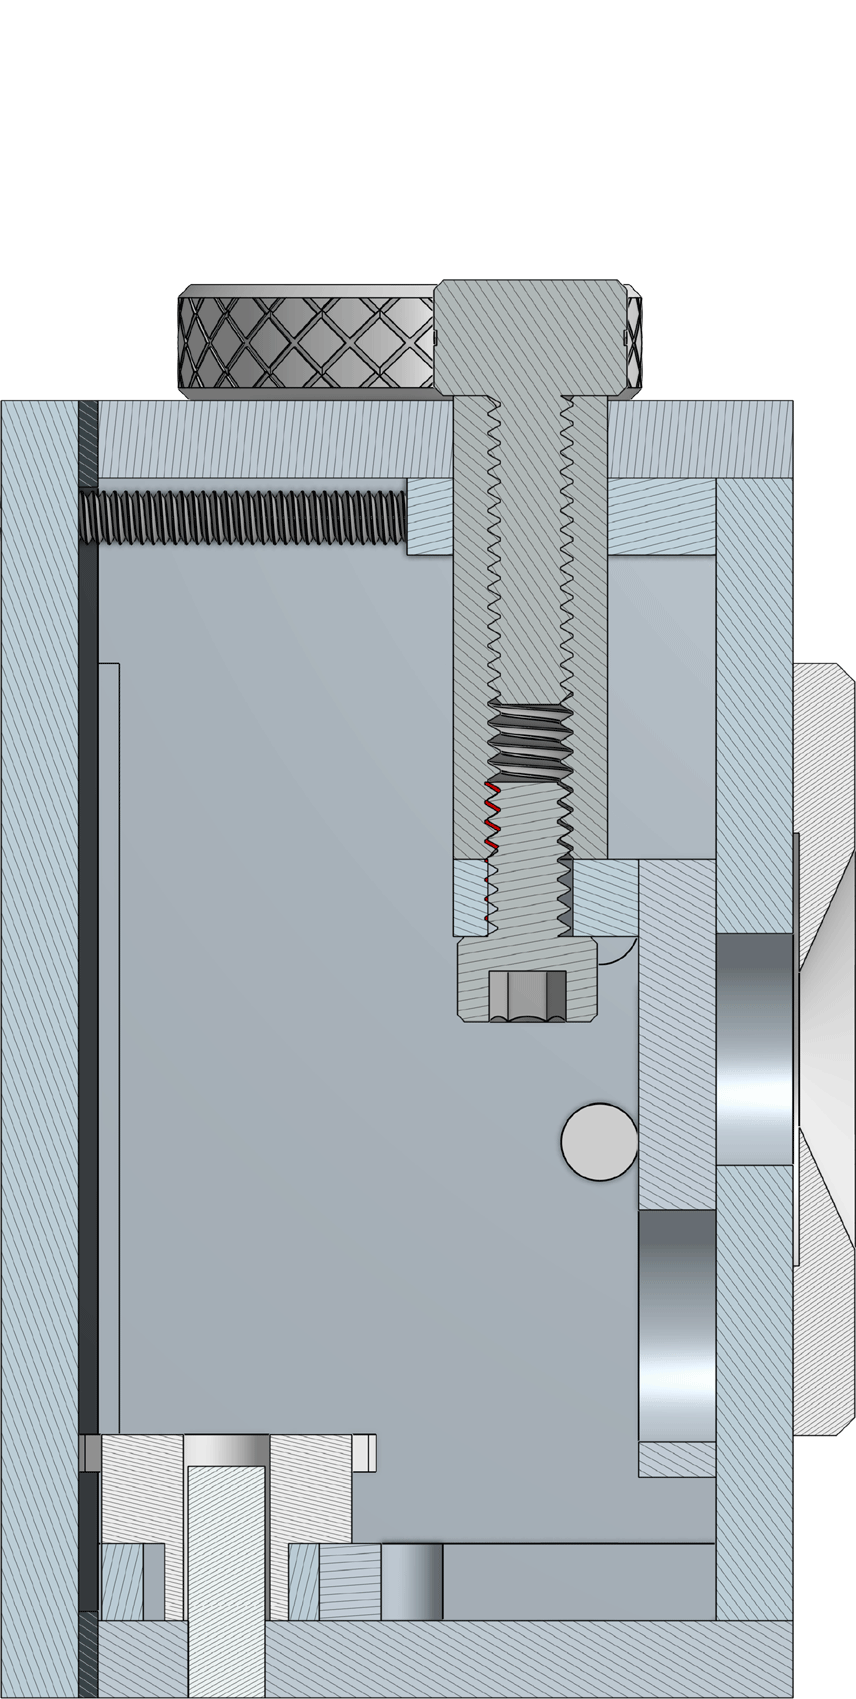
To advance the film, the knob on the left is wound clockwise, and to rewind it, the knob on the right wound counterclockwise. To take a photo, the user pulls on the small thumb screw. Doing this pulls up a shutter inside the camera, allowing light through the pinhole and onto the film.
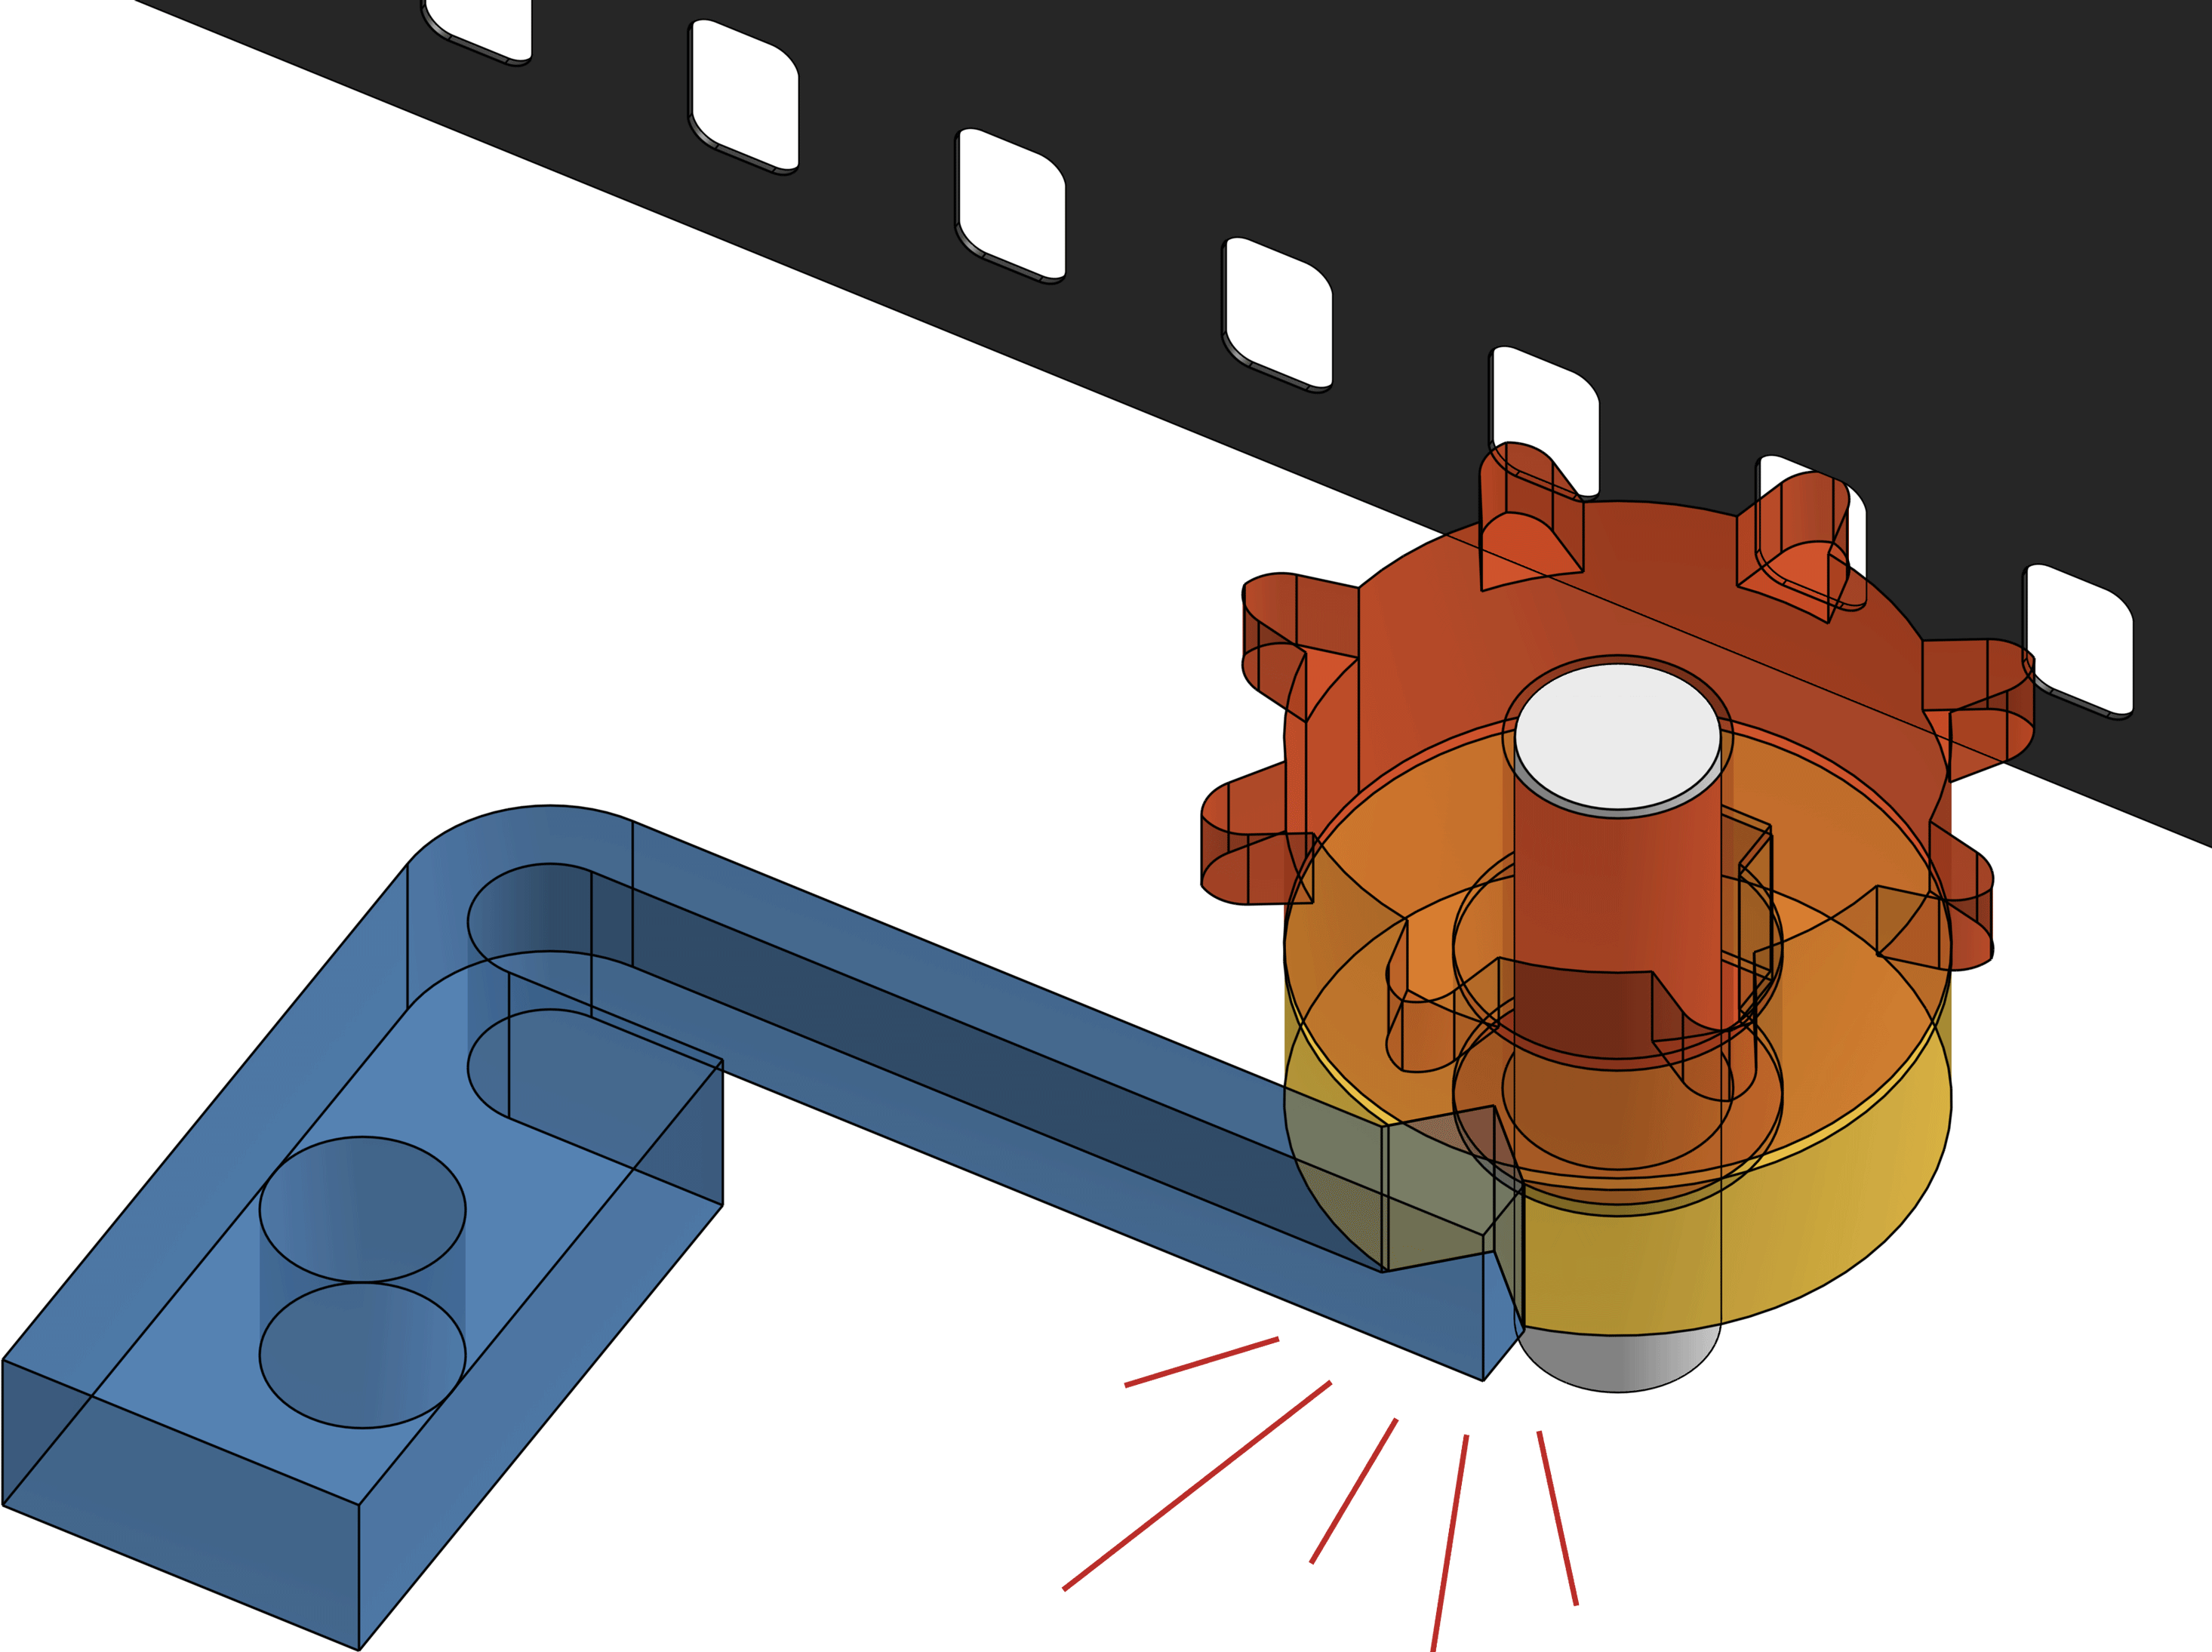
I redesigned the film advance mechanism to include a small cog that sits under the sprocket that is spun by the film as it passes against it. A lever arm clicks into place for every frame that passes, providing auditory and tactile feedback to stop winding when film is centered about the pinhole.
Building these cameras has been a fun side project for the past few years that’s also given me a chance to use both my ‘left’ and ‘right brain’ together. I’m excited to keep experimenting with film, and to keep building higher resolution, prettier, and easier to use cameras.